An Introduction to MIDI Connections
What is MIDI?
MIDI stands for Musical Instrument Digital Interface. It consists of a set of digital signals that are used for controlling and playing electronic musical instruments.
It’s important to realise that MIDI doesn’t contain any actual sound itself, it’s simply instructions for how other instruments should create sound. In this sense it works like the conductor of an orchestra. The conductor doesn’t make any sound by their self, but they send signals to all of the other members of the orchestra that tell them what to play, when to play, and what expression to use while playing. MIDI is like an electronic version of that.
How is MIDI transmitted?
There are four ways that MIDI can be transmitted using an iConnectivity interface:
DIN-MIDI
USB-DAW
USB-MIDI
RTP-MIDI
Let’s examine each of these in turn.
DIN-MIDI Connection
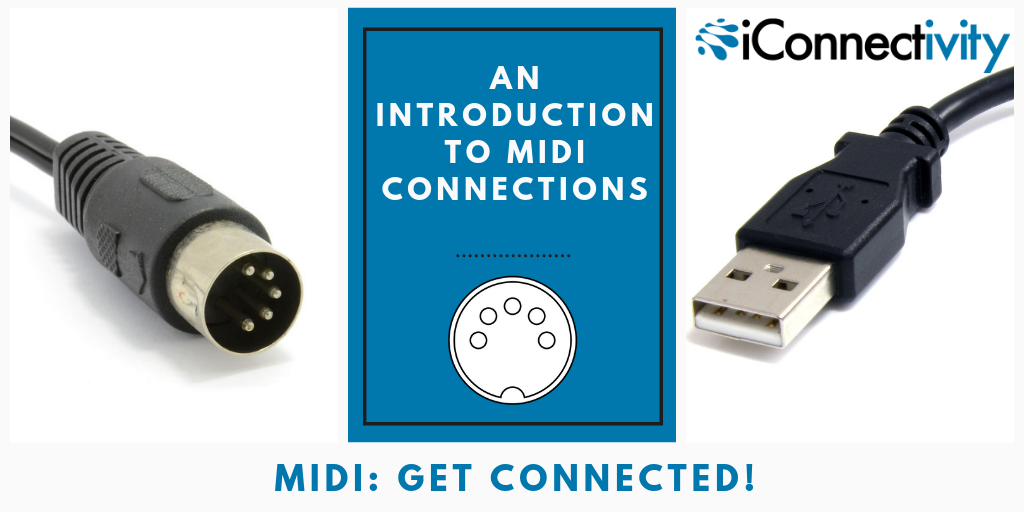
Those cables with the round 5 pin connectors (officially called DIN 41524 connectors) were originally used as hi-fi cables way back in the 1970s. These cables became obsolete in the 1980s, and when MIDI was invented in 1983 many Japanese manufacturers had lots of back stock of them that they needed to get rid of, so they decided to make that the first MIDI cable standard. Even though it’s no longer used for hi-fi any more, you will still see ports like this on nearly every piece of MIDI gear.
The original 5-Pin DIN-MIDI connection
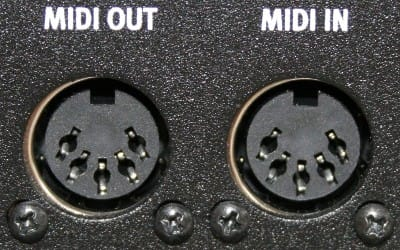
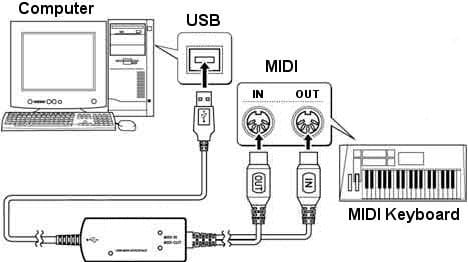
Although this has long been the standard, DIN-MIDI connections have one major flaw: MIDI running over DIN connectors can only travel in one direction! MIDI signals always go out from a MIDI Out connection, and in to a MIDI In connection. That means you must always connect DIN-MIDI cables from a controller’s MIDI Out jack to an instrument’s MIDI In jack. You can see this in the diagram below: the MIDI Out plug is plugged into the keyboard’s MIDI In socket, and the MIDI Out socket on the keyboard is connected to the MIDI In plug.
That’s a great system if we only want to connect our computer to one keyboard but what if we want to add more MIDI instruments or use multiple sounds from our keyboard synth?
We handle that by using MIDI Channels. Each hardware DIN-MIDI connection has 16 MIDI Channels available, each of which can send instructions to a different MIDI instruments. It’s like our conductor having an orchestra of 16 instruments that they can talk to all at once.
However that’s still a pretty small orchestra - what if we need more instruments? We can add more by simply adding more DIN-MIDI hardware ports, each of which will bring us another 16 MIDI channels.
Additional DIN-MIDI ports allow for more connections, more instruments, and more channels.
USB-DAW Connection
In the diagram below you can see that not only is the keyboard connected to a MIDI interface with DIN-MIDI cables, the interface is connected to a computer with a USB cable. We refer to this as a USB-DAW connection (DAW is short for Digital Audio Workstation, meaning a computer running a digital audio/MIDI application such as Ableton Live, Cubase, or Pro Tools).
A basic USB-DAW MIDI connection setup
Using a USB-DAW MIDI connection has several advantages:
You can send MIDI data both ways, so you only need one cable for both MIDI In and MIDI out.
A USB connection has much higher bandwidth than a DIN-MIDI connection, which means that instead of each cable having just one physical port with 16 channels, a single USB cable can support 16 virtual MIDI ports each with 16 channels, for a total of 256 MIDI channels down one cable!
Until now this has been the standard way that most MIDI interfaces connect computers and MIDI devices together. However modern iConnectivity interfaces have extra ports that other more traditional interfaces do not have. Let’s take a look at those.
USB-MIDI Connection
Because USB has become the most common standard for computers, many modern MIDI instruments and controllers now come with a USB-MIDI port as well as traditional DIN-MIDI ports. This means that you can plug your MIDI device directly into your computer without requiring an interface at all (assuming you have enough free USB ports on your computer).
However USB-MIDI does have one significant drawback. USB connections work on a Host / Peripheral basis - normally the computer must be the Host and any MIDI instrument or controller is considered a Peripheral. That means for example, that you cannot normally connect a MIDI keyboard and a MIDI instrument together directly via USB. You must connect each of them to a computer system first.
To get around this limitation iConnectivity audio and MIDI interfaces have the unique ability to act both as a Peripheral to any computer they are connected to, and as a Host for any other standard MIDI Peripherals. iConnectivity interfaces do this via our USB-MIDI Host ports. You can plug a standard MIDI controller or instrument directly into the iConnectivity USB-MIDI Host port with a USB cable without requiring a computer at all. The picture below shows a iConnectivity USB-MIDI Host port on the far left side, marked by the USB logo (note that on newer iConnectivity interfaces this port is marked as USB-MIDI).
The back panel of a typical iConnectivity MIDI interface. Note the USB-MIDI Host port situated far left.
Using multiple USB-MIDI connections
If you have multiple USB-MIDI devices and not enough USB-MIDI ports in your iConnectivity interface, don’t panic! You can add more USB ports by simply plugging a standard USB hub into your interface’s Host port. iConnectivity interfaces can support 8 or more USB-MIDI devices plugged in at the same time!
Unlike DIN-MIDI ports which are assigned fixed numbers in hardware (DIN-MIDI 1, DIN-MIDI 2 etc.) the USB-MIDI ports on your interface are assigned their port numbers flexibly. That means that it doesn’t matter which of the USB-MIDI ports you plug your first MIDI instrument into, or even if it’s plugged into a USB hub, it will always be automatically assigned to USB-MIDI Host port 1 (sometimes marked in software as HST1).
The second USB-MIDI device that you plug in will then always be automatically assigned to USB-MIDI port 2 and so on. This enables extreme flexibility in cabling and controlling your MIDI instruments. However because these port numbers are assigned dynamically you may find that they are reassigned differently after a restart. To fix this we recommend that you reserve a USB-MIDI port for each of your MIDI instruments using the Auracle Setup Wizard. See the Auracle User Guide for more information on this.
USB hubs and power
iConnectivity USB-MIDI Host ports normally supply enough power to run several low-power MIDI devices, such as controllers and small synthesisers. However in some cases you may find that if you have multiple MIDI devices all requiring USB bus power that you run out of juice. If so, consider switching to a powered USB hub - these are a little more expensive than the unpowered versions, but are highly recommended for stable operation with multiple devices.
Non-standard USB-MIDI devices
Most MIDI devices with USB ports follow the standard protocol for USB-MIDI - we call this being “class compliant”. However some more advanced MIDI devices have extra features not covered in the MIDI specification and are thus not fully class compliant. Devices like these will not operate correctly when attached to an iConnectivity USB-MIDI Host port. If in doubt, please consult our USB-MIDI Compatibility Chart.
RTP-MIDI Connection
DIN-MIDI and USB-MIDI connections both have a significant drawback: you are limited to using only short cables - very short cables in the case of USB-MIDI. This can be a serious problem on stage or in a studio with lots of MIDI gear, especially when you need to connect a computer to a MIDI interface with a USB-DAW connection. They also require a lot of cables and patch systems if you have multiple MIDI instruments in your setup.
But there is a better way to connect your computers and MIDI interfaces: Ethernet!
We can use Real Time Protocol MIDI to send MIDI signals using any standard Ethernet network. This gets around all of the limitations of both DIN-MIDI and USB-MIDI:
You can use very long cables (up to 100 metres!) without any signal loss
You can transmit thousands of MIDI channels down a single cable
You can connect any MIDI device to any another device instantly via your Ethernet network
iConnectivity MIDI interfaces have built-in Ethernet ports and can translate standard DIN-MIDI or USB-MIDI signals to RTP-MIDI signals and send them over an Ethernet network.
In the picture above the Ethernet port is the squarish one in the middle, marked with the Ethernet logo <•••> (on newer iConnectivity interfaces this port is marked as RTP-MIDI).
All you need to get started with RTP-MIDI are a couple of standard CAT5 or CAT6 Ethernet cables and a basic Ethernet switch, available from any electronics store. You plug your iConnectivity interfaces into the Ethernet switch, then you plug your DIN-MIDI and USB-MIDI controllers and instruments into your iConnectivity interfaces. This will create a true MIDI network that enables you to send your MIDI signals to and from any computer on the network, or to any other MIDI device directly.
To configure an RTP-MIDI network of your own can take a little time to set up but it’s very much worth it, especially if you have a lot of MIDI equipment you need to connect. We strongly recommend that all users consider switching to Ethernet communication for MIDI going forward.
You can find full instructions on how to configure an RTP-MIDI network in the Auracle User Guide chapter on Using MIDI over Ethernet.


