Pro Tips for Mastering the mioXM: Remotely Changing Presets via Program Changes
The mioXM is a powerful tool that can enhance your audio setup and create an efficient workflow for your live performance or in the studio. In a previous article, we discussed saving individual presets to route outputs based on your specific setup needs. For example, on one preset, you could route the output to DIN 2, while on another preset, you might route the same information to Output 1.
In this article, we'll guide you through another pro-level technique for using the mioXM: how to remotely select and activate presets directly from your DAW, with Ableton Live as an example!
Using Your DAW to Control mioXM Presets
Integrating DAW control over your MIDI hardware simplifies complex audio setups and opens up creative possibilities. By using Ableton Live to control mioXM presets, you gain flexibility to adjust setups across various scenarios, whether for studio sessions or live performances.
To get started, connect the mioXM to your computer using the USB-DAW connection.
Setting Up Ableton Live to Control mioXM Presets
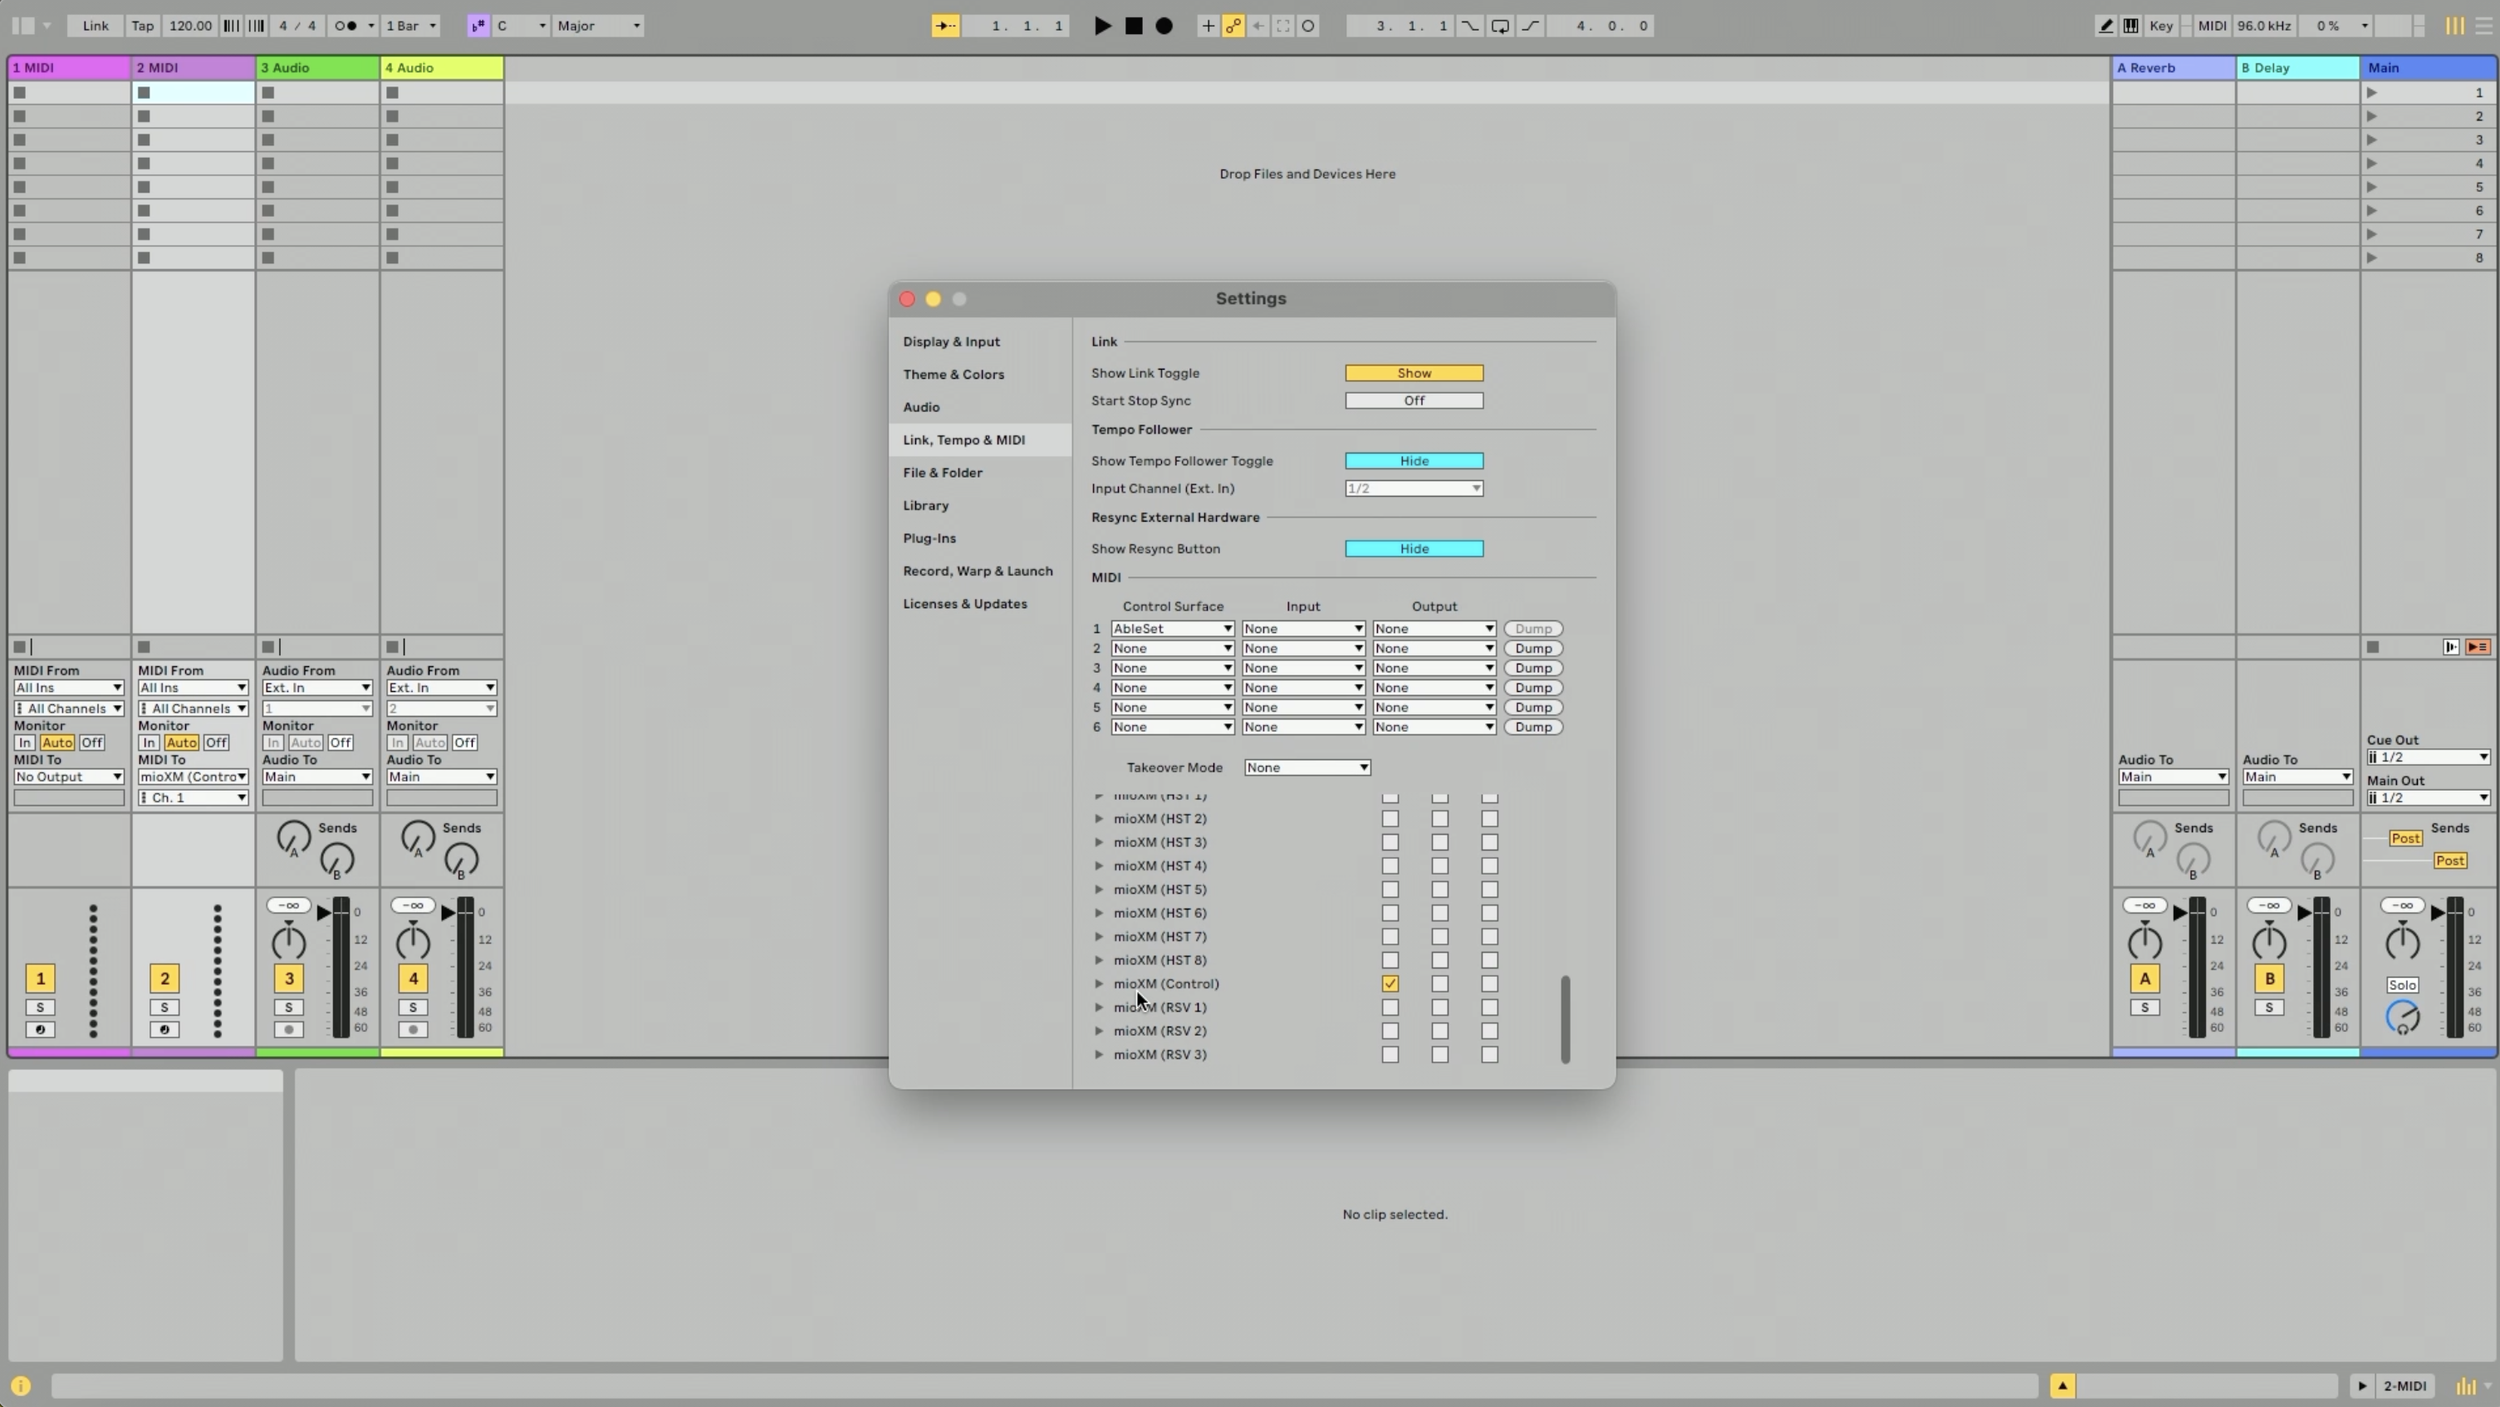
Once you have the mioXM connected, in your DAW of choice, enable the mioXM (Control) output to allow for MIDI message transmission. For Ableton Live, head to Preferences and click on the Link, Tempo & MIDI tab. Under the MIDI Out section, enable “track” for mioXM (Control).
Configuring Your MIDI Track
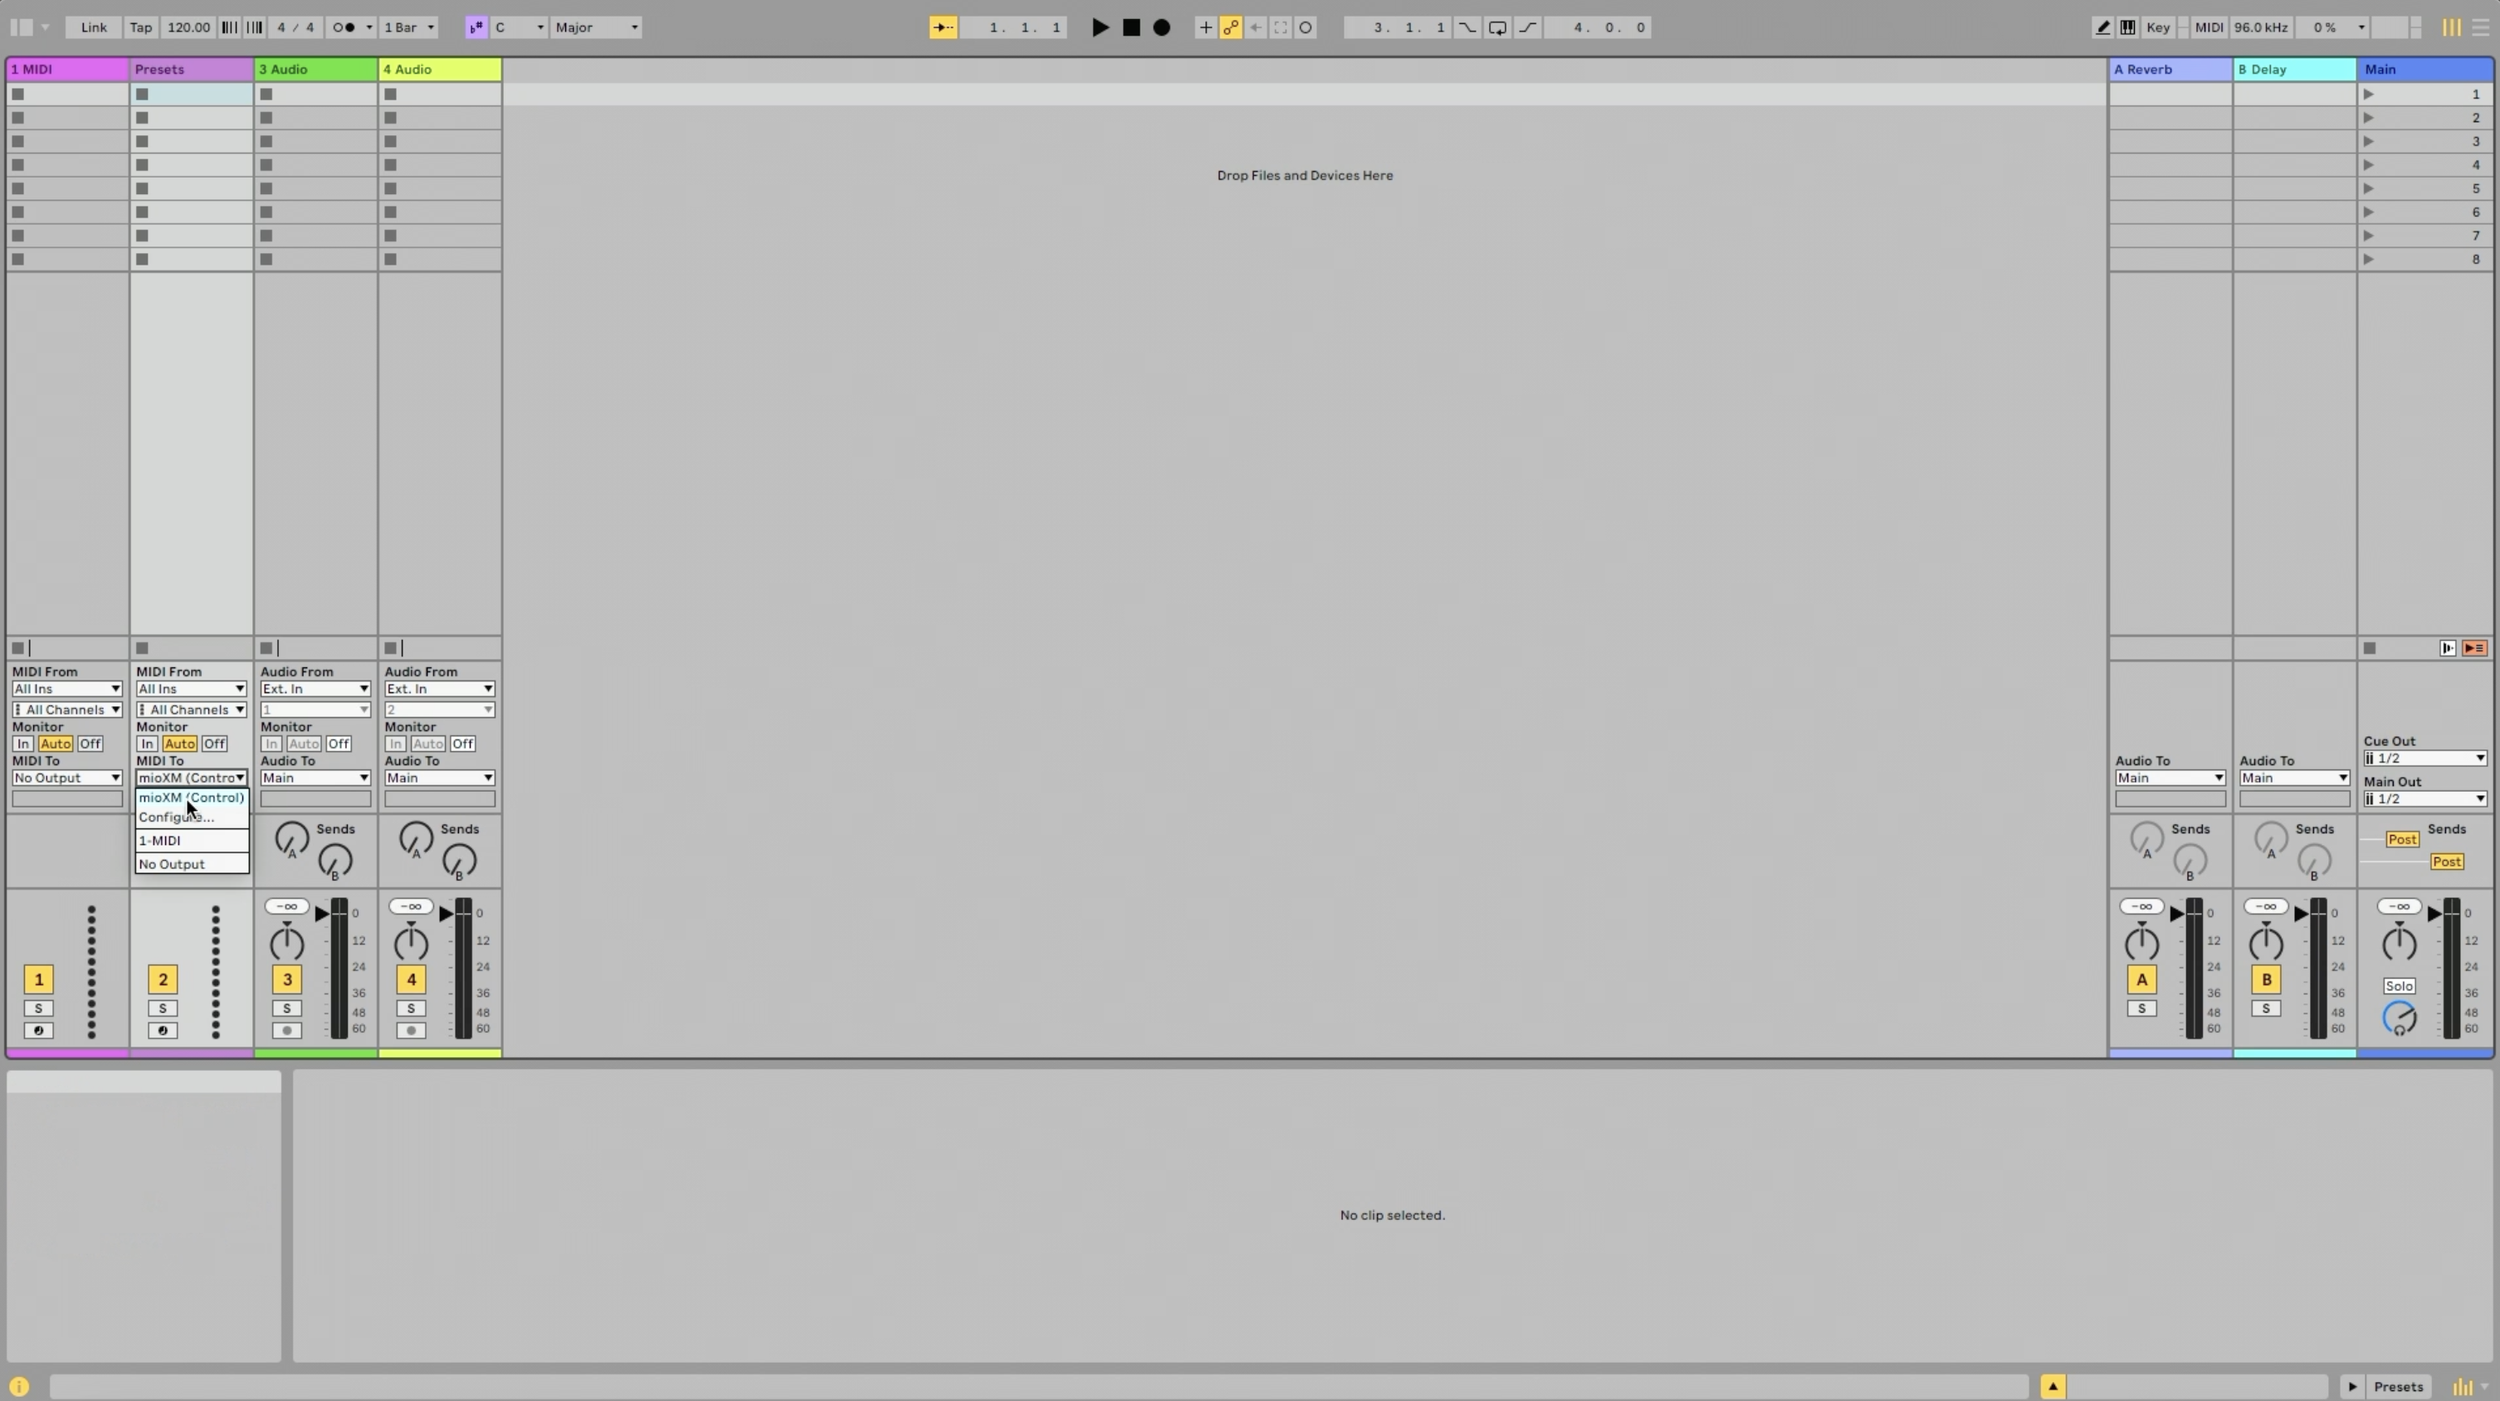
Next, choose a MIDI track in Ableton, and configure a MIDI track in Ableton Live by selecting mioXM (Control) under the MIDI To section.
Creating MIDI clips
After you’ve configured your MIDI track, let’s create a MIDI clip that is capable of sending program changes to seamlessly switch between different presets. This process will look slightly different depending on your setup but the principle will work no matter which DAW you’re currently using.
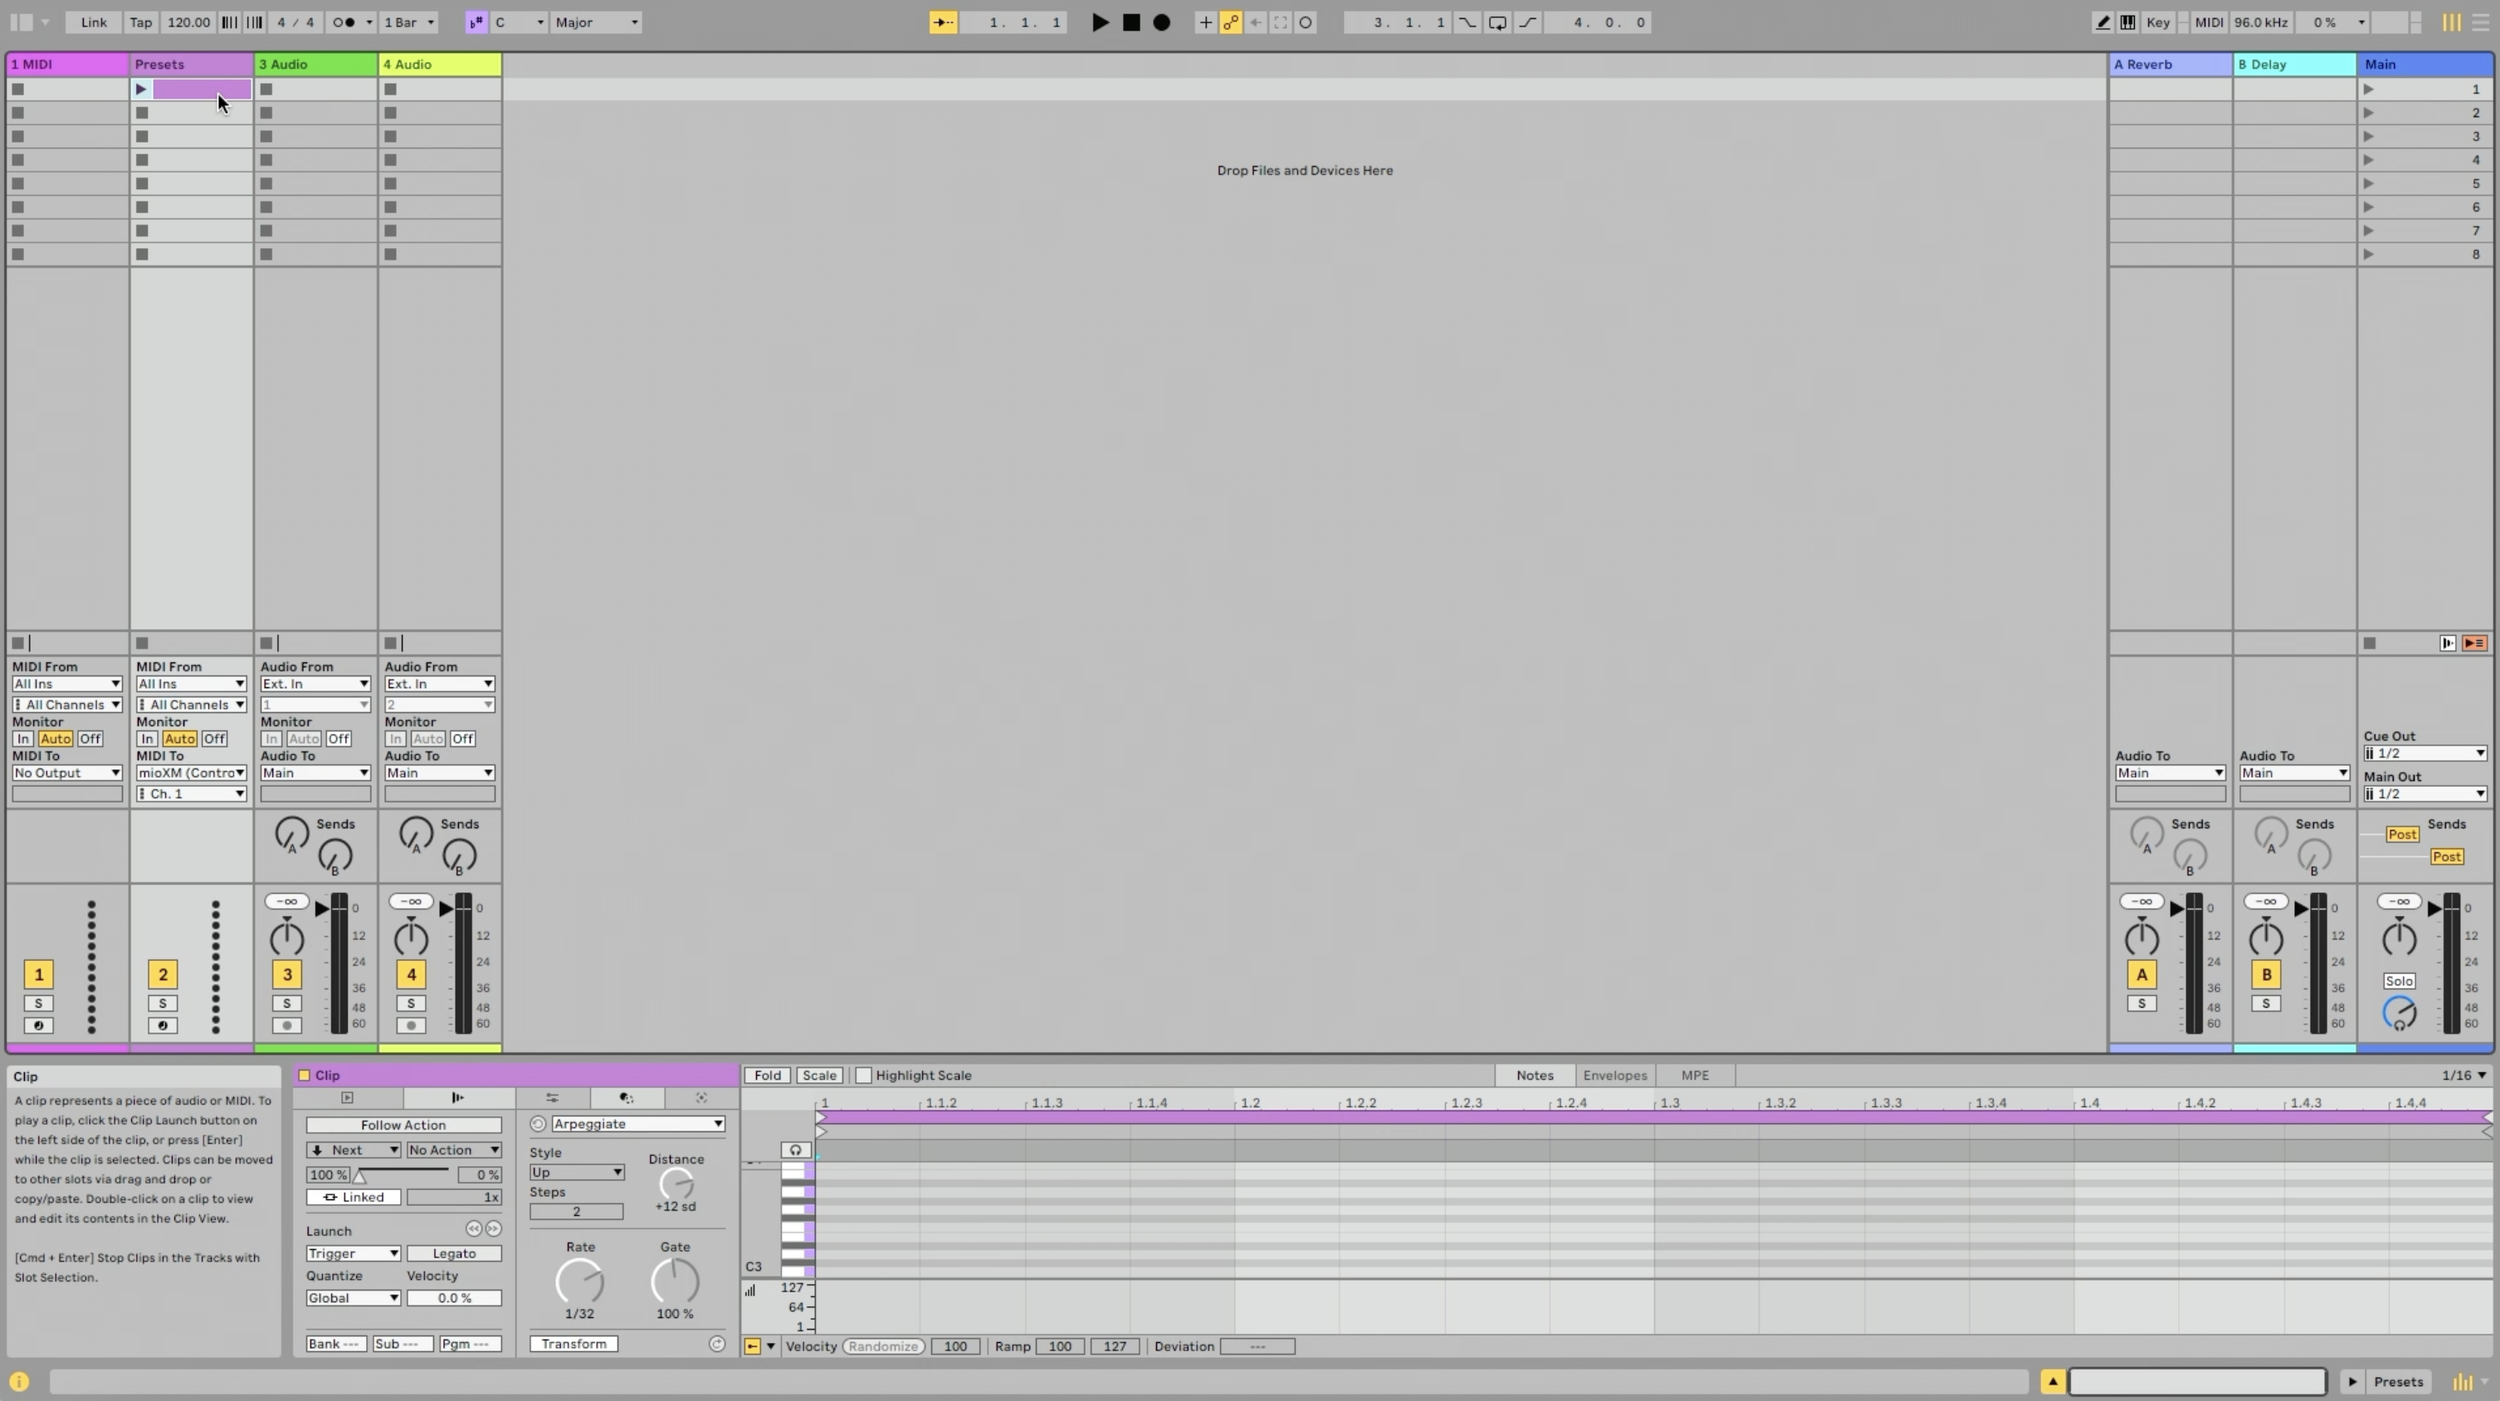
In your MIDI track double-click to create a dummy MIDI clip.
Assigning Program Changes & Naming Presets
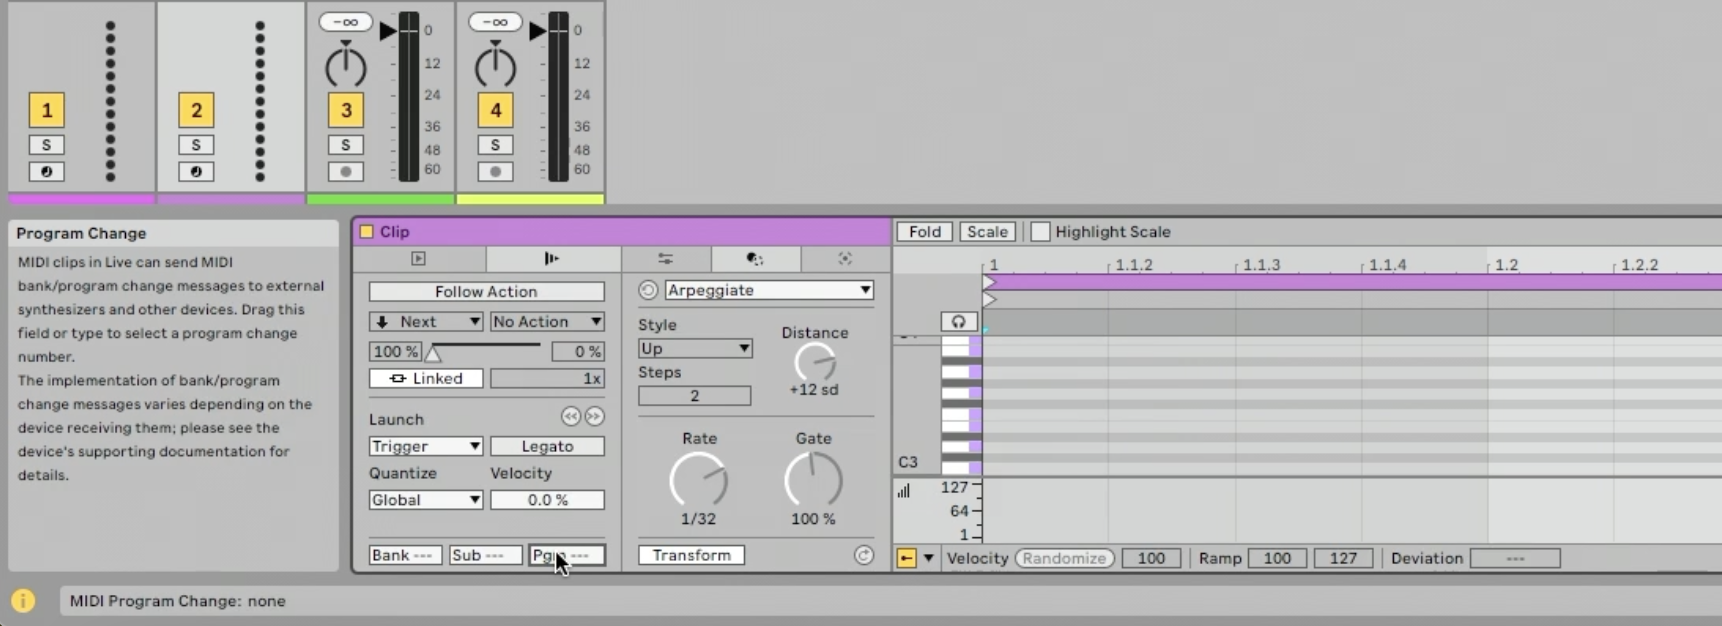
Within the clip setting, in the launch tab near the bottom, find the Bank, Sub, and Program fields. Assign a program change number for your first preset by typing in 1 under Program.
Rename your dummy MIDI clip as Preset 1
You can create additional presets by simply duplicating your original clip. Under the clip settings be sure to assign a new program change number to each additional clip that you create, according to its preset. (e.g., 2 for Preset 2)
Rename each additional clip according to its assigned preset. (e.g., "Preset 2," "Preset 3", etc.)
Now, simply launch these clips to switch between presets in real time. All you have to do is click each preset launch button and watch the front panel of your mioXM as it remotely switches between Mem 1 through 4.
The Efficiency of Program Changes
Sending program changes from your DAW to toggle presets on your mioXM reduces the need for manual adjustments, allowing you to stay focused on the creative aspects of music production. Each program change command sent from your DAW immediately updates your audio setup without requiring physical access to the mioXM.
Mastering remote control of your mioXM presets in your DAW streamlines your workflow, making your production process smoother and more intuitive.
Explore further by checking out our blog for more articles, where we dive deeper into maximizing your gear.
Have any questions we didn't cover in this article? Check out our Help Center for more help!


