Sending MIDI Over Long Distances via Ethernet
One of the most exciting things about using MIDI is the ability to expand your setup by sending MIDI over a network. This leverages built-in RTP (Real-Time Protocol) MIDI and Mac’s Audio MIDI Setup, enabling seamless MIDI communication across computers on a network with just an Ethernet cable. When paired with the PlayAUDIO1U interface, the potential expands even further, supporting a fully redundant MIDI setup with two computers – one primary and one backup – connected on the same network. This article walks you through setting up a redundant, network-based MIDI system using RTP MIDI with PlayAUDIO1U, ensuring consistent, reliable performances.
Setting Up Your Hardware
To begin, you’ll need the following:
A PlayAUDIO1U interface, which serves as the backbone of your MIDI redundancy setup.
An network switch (a simple device for connecting multiple computers to the same network).
Ethernet cables for each device you intend to network.
Connecting Devices to the Network Switch
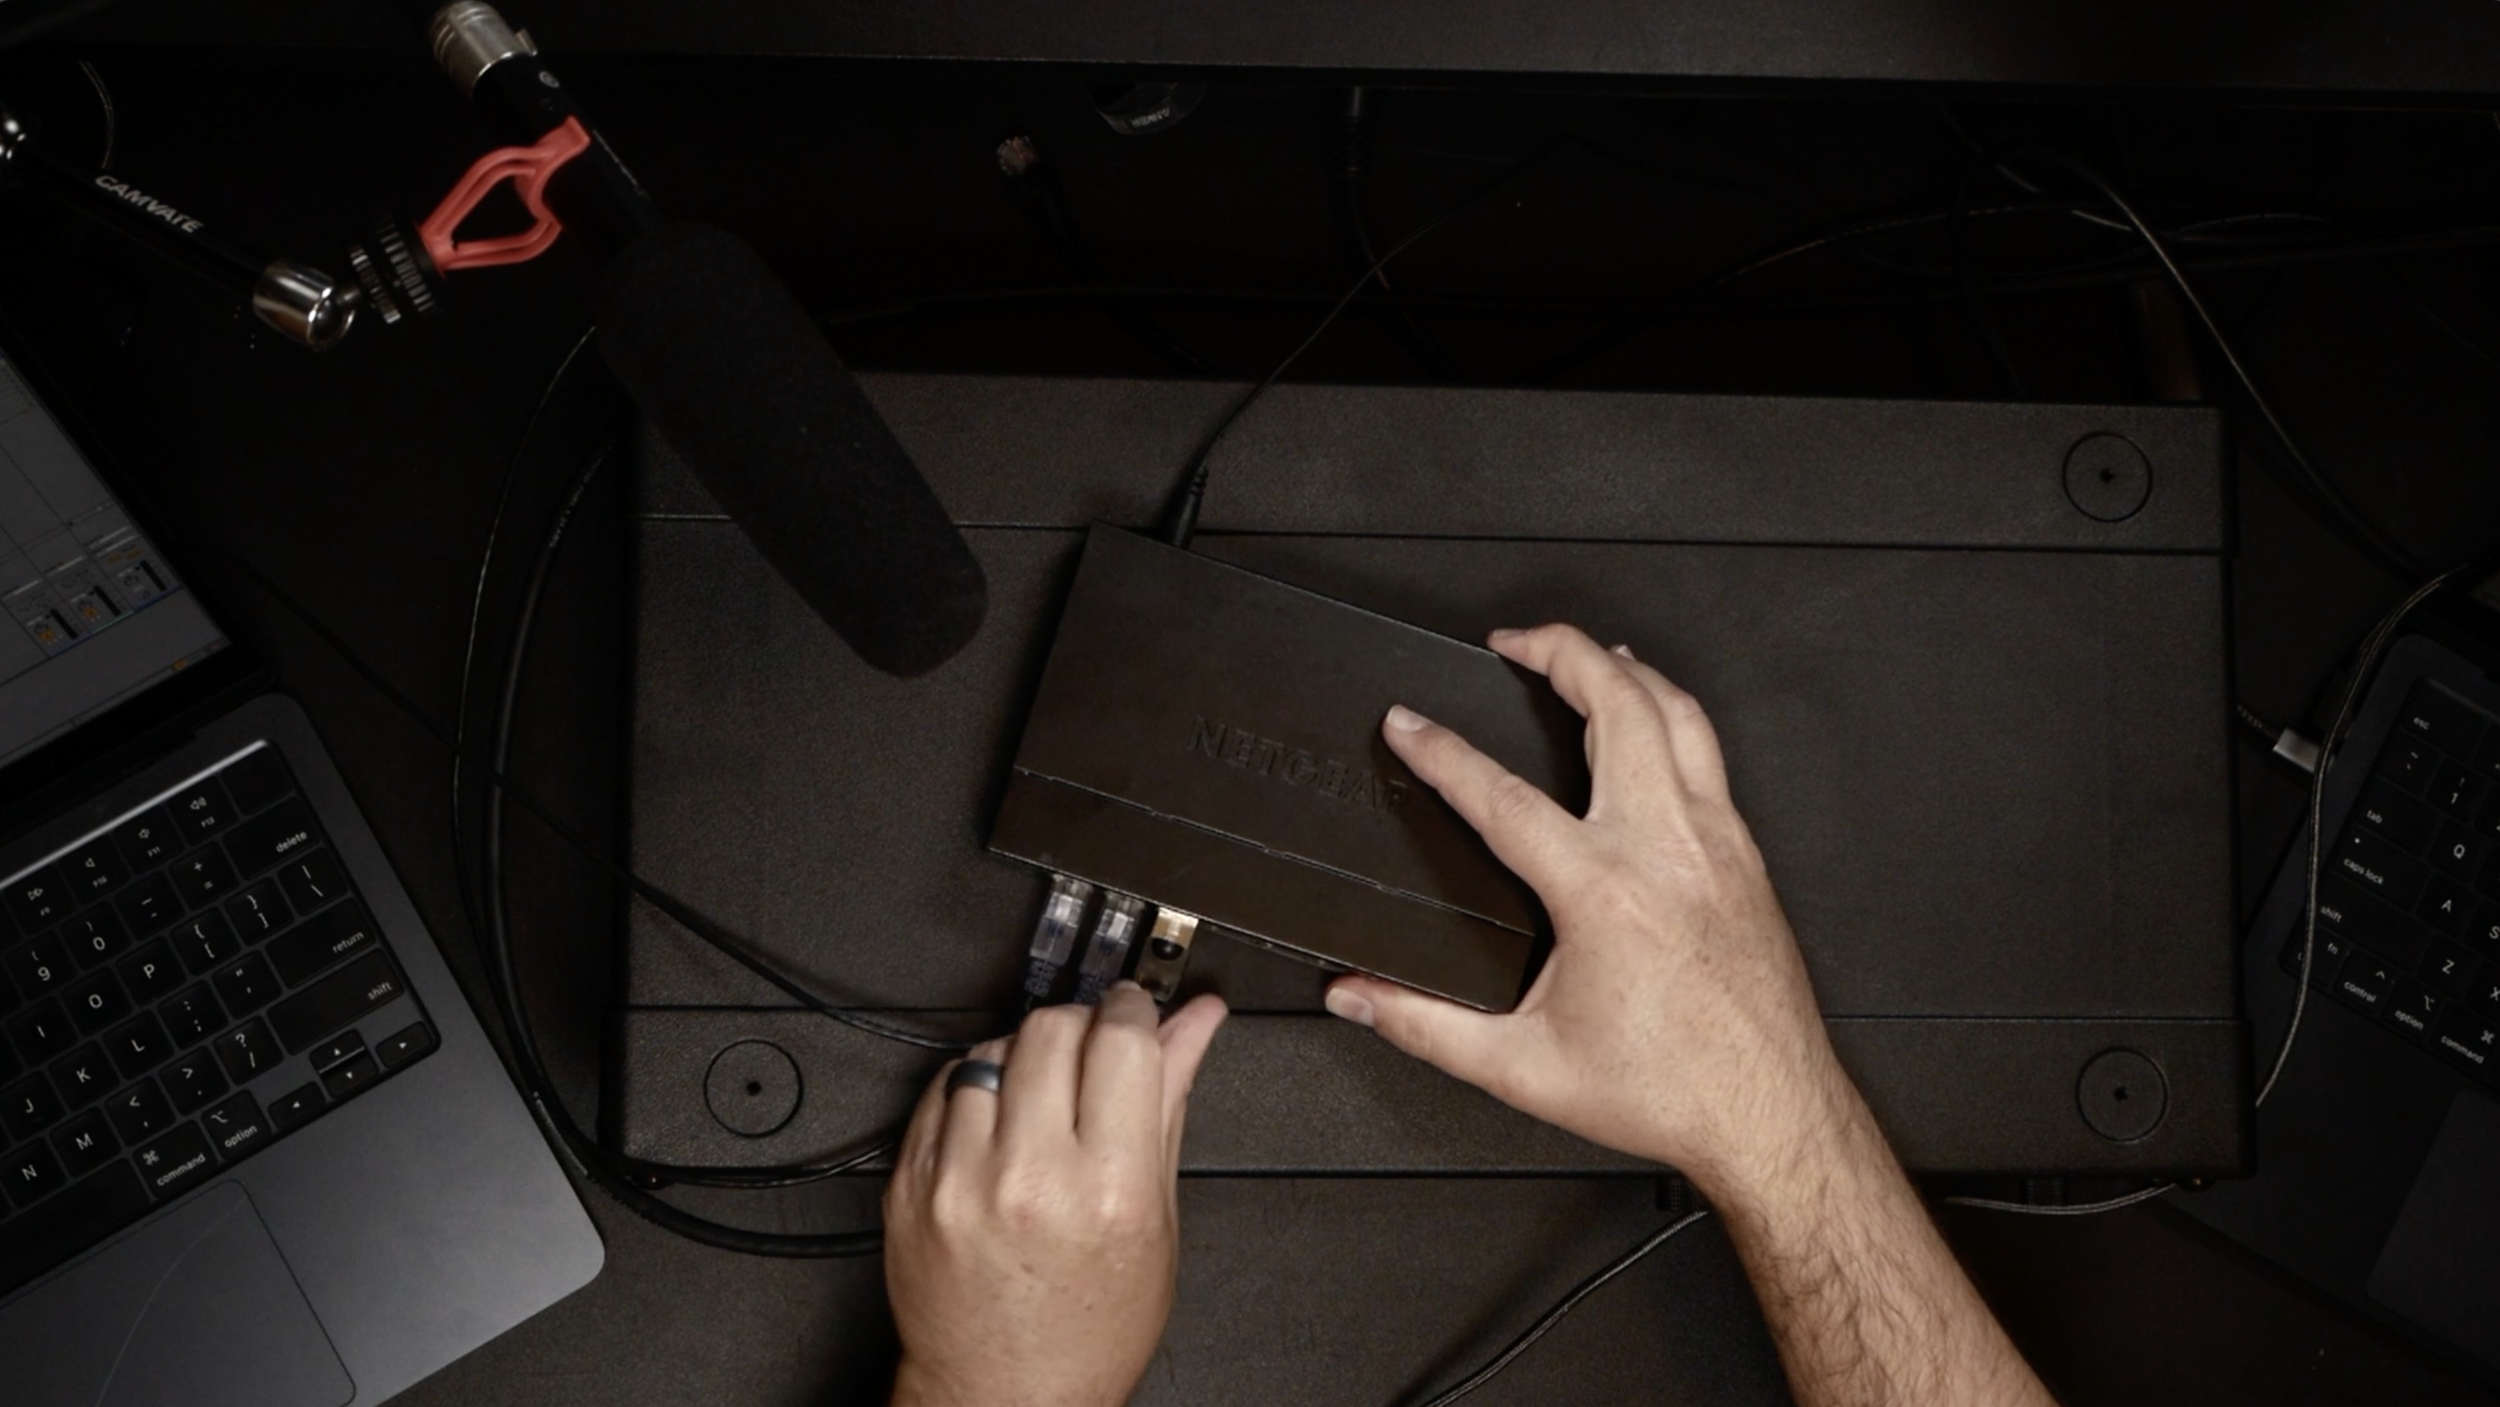
Connect the PlayAUDIO1U, your primary playback computer, and remote computer to the network switch using Ethernet cables. These connections form the base of your MIDI network, where each device can communicate effectively and will allow MIDI data to travel seamlessly between devices without internet access.
Setting Up RTP MIDI on Mac
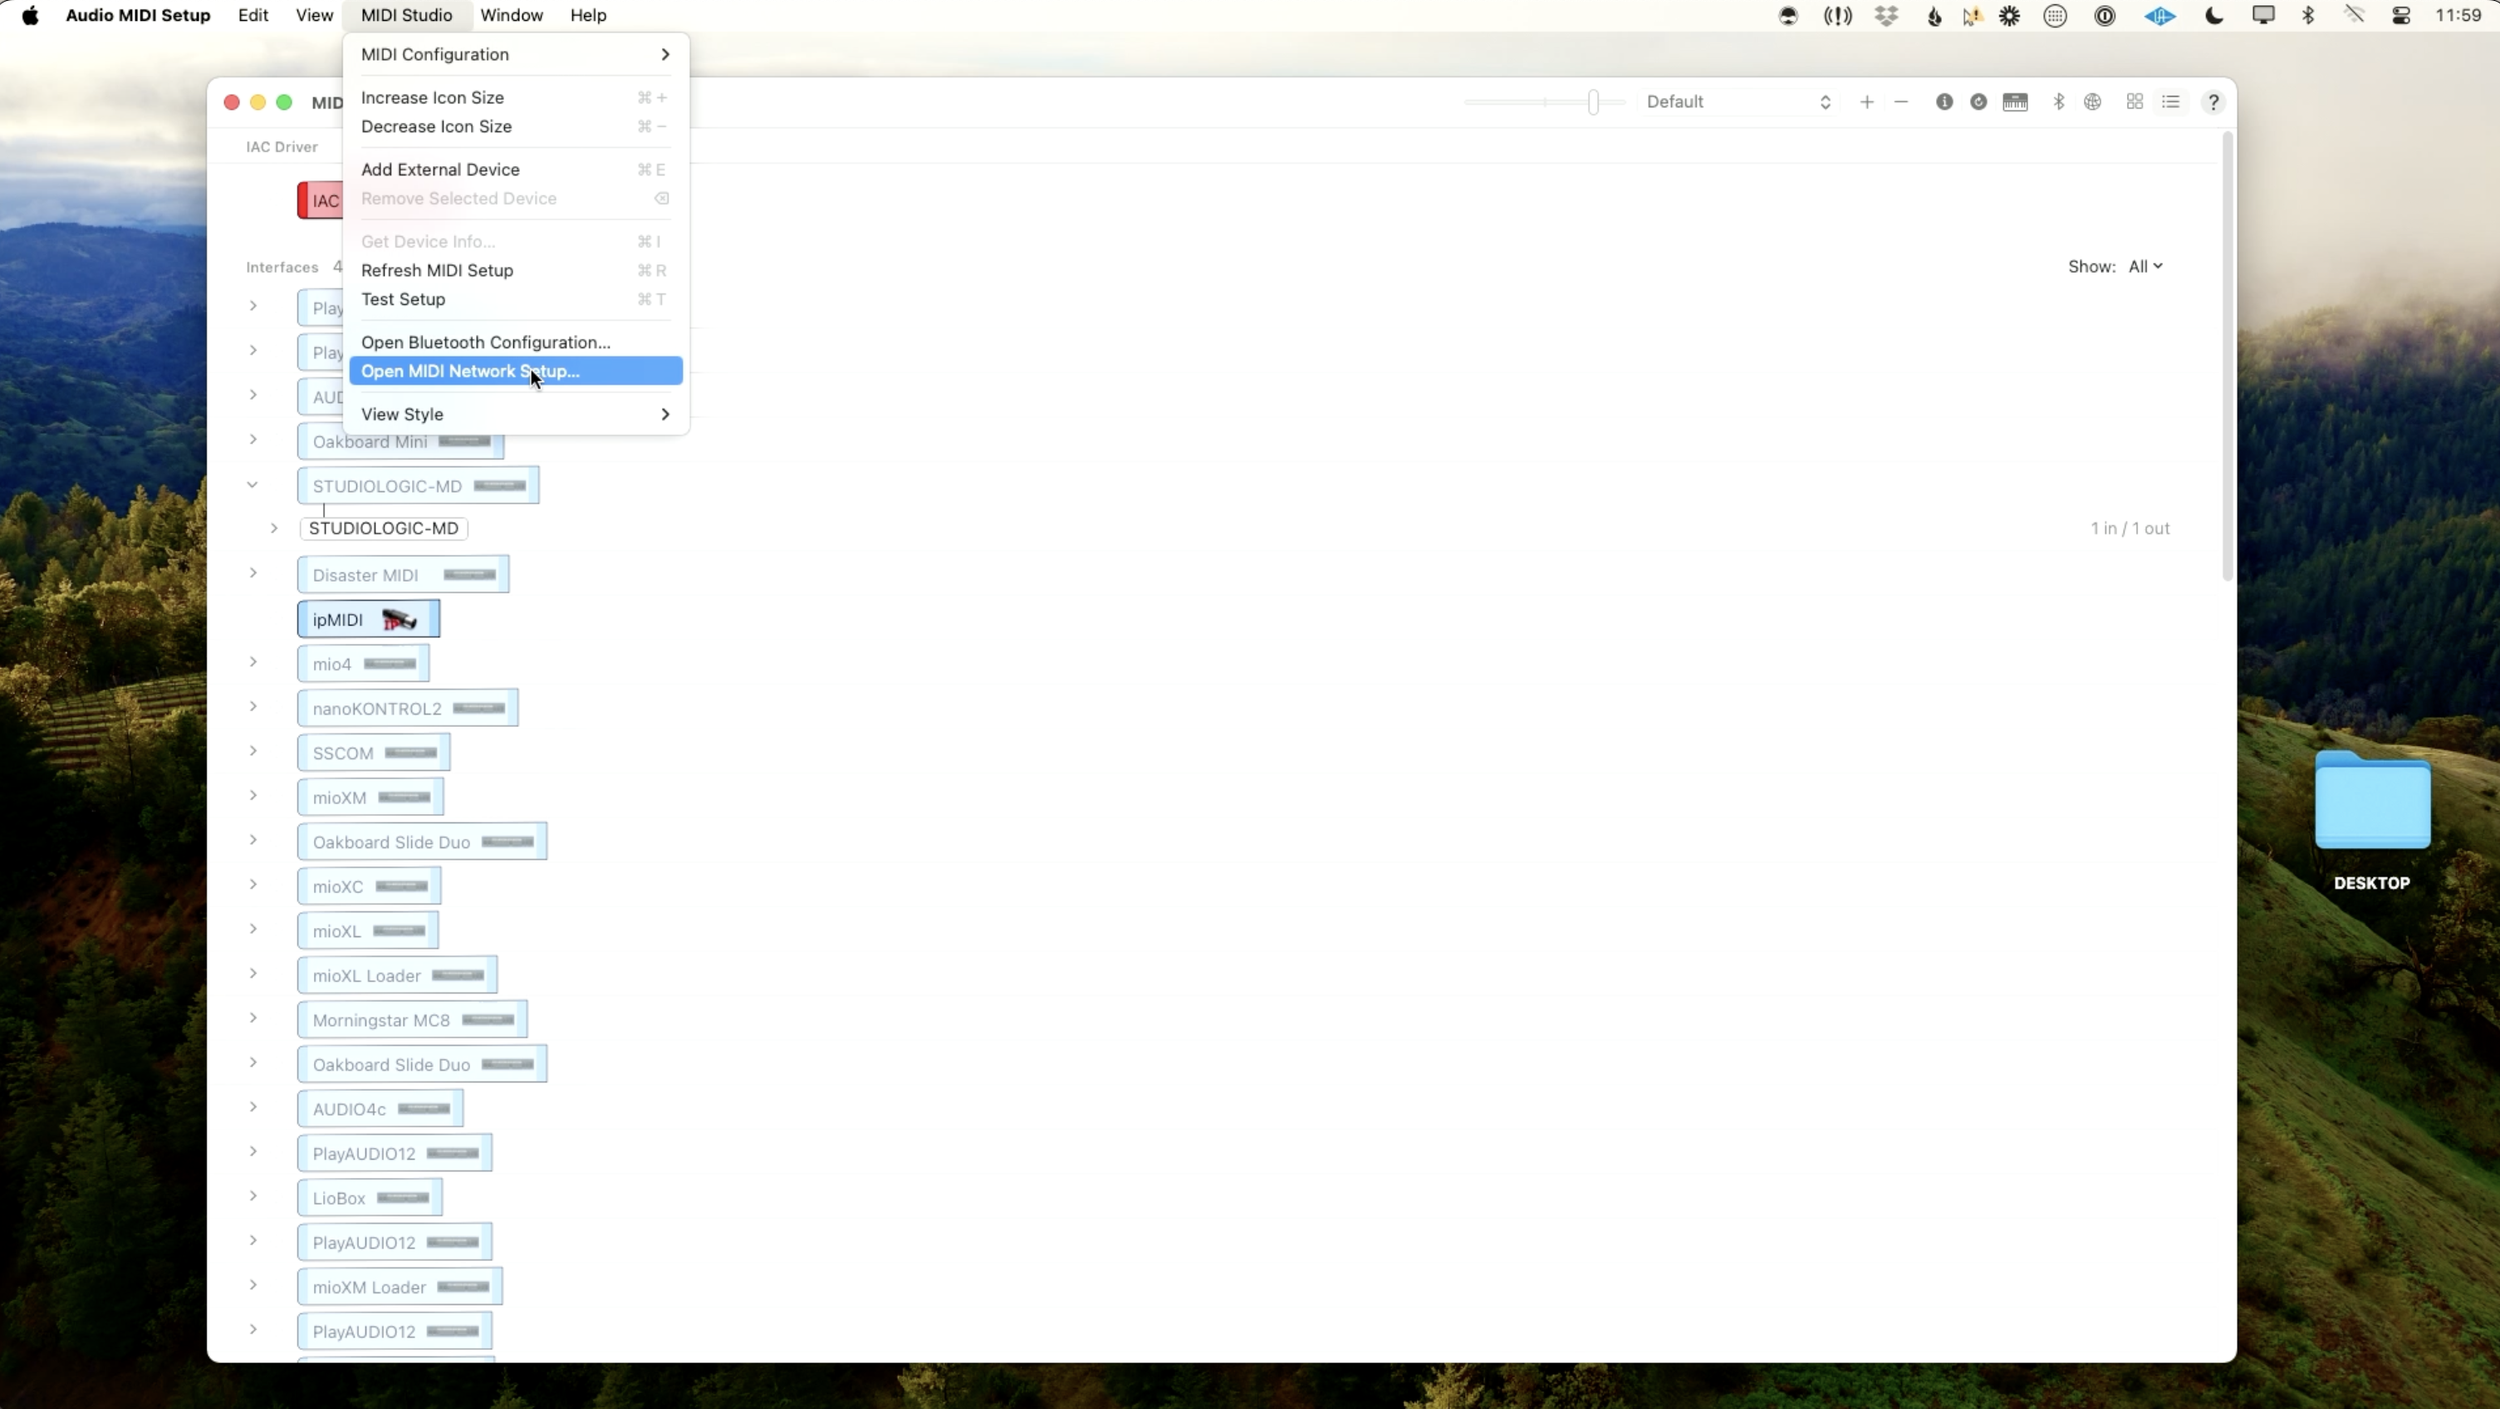
On your remote computer (the computer you want MIDI passed to), use Spotlight to search for "Audio MIDI Setup" on your Mac. Open it and navigate to “Show MIDI Studio” from the Window menu. Under the MIDI Studio dropdown, click on Open MIDI Network Setup.
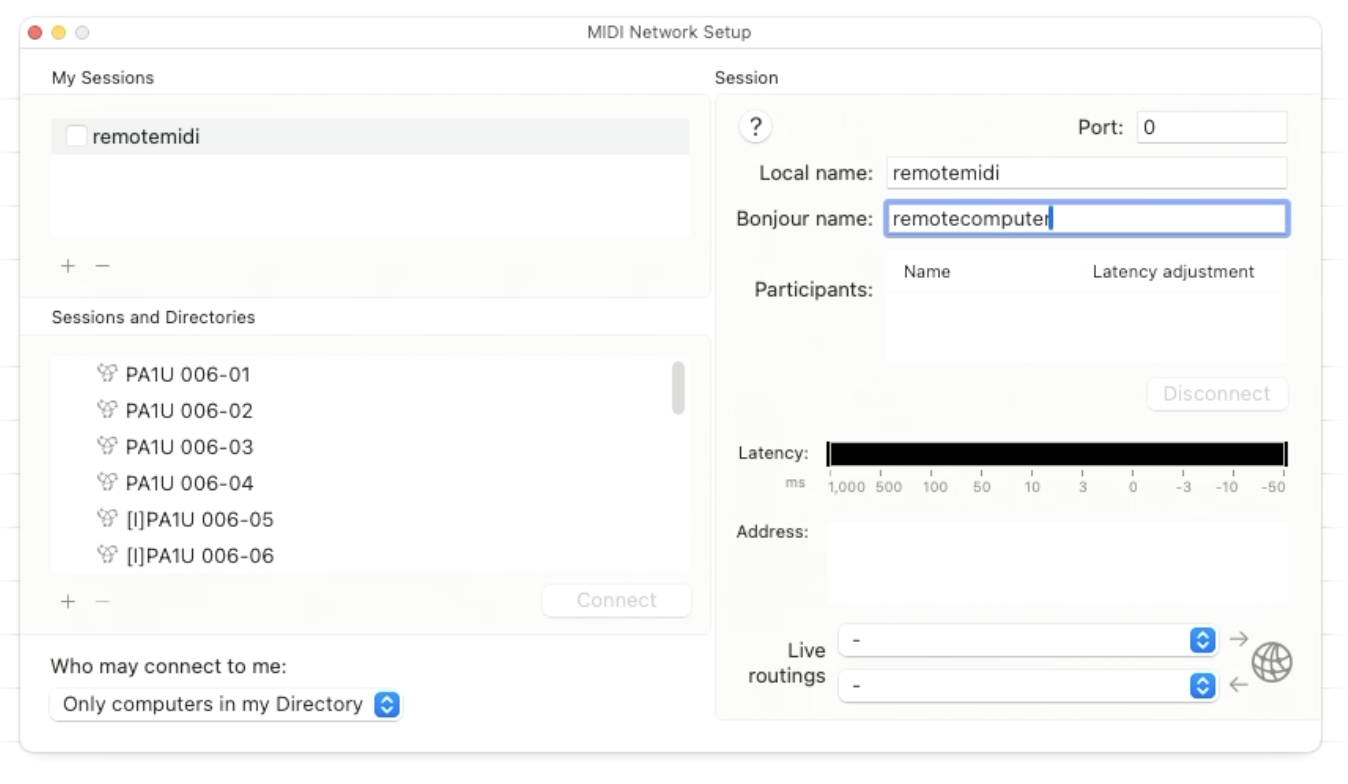
If this is your first time setting up, create a new session by pressing the ‘+’ button under “My Sessions.” For Local Name, choose a name that represents your remote computer’s MIDI connection, such as "Remote MIDI."
For the Bonjour Name, set a recognizable name like "Remote Computer." In the bottom left hand corner under "Who may connect to me," select "Anyone" to allow networked devices to connect. Last but not least, make sure you click the box to enable you connection under My Sessions.
If you’re performing this setup on a Windows PC, download the free RTP MIDI app and follow the same exact process.
This setup process establishes your remote MIDI connection, simplifying the network routing. Remember your Bonjour Name ("Remote Computer" in this example) as you'll use it in subsequent configuration steps.
Configuring Auracle for X-Series
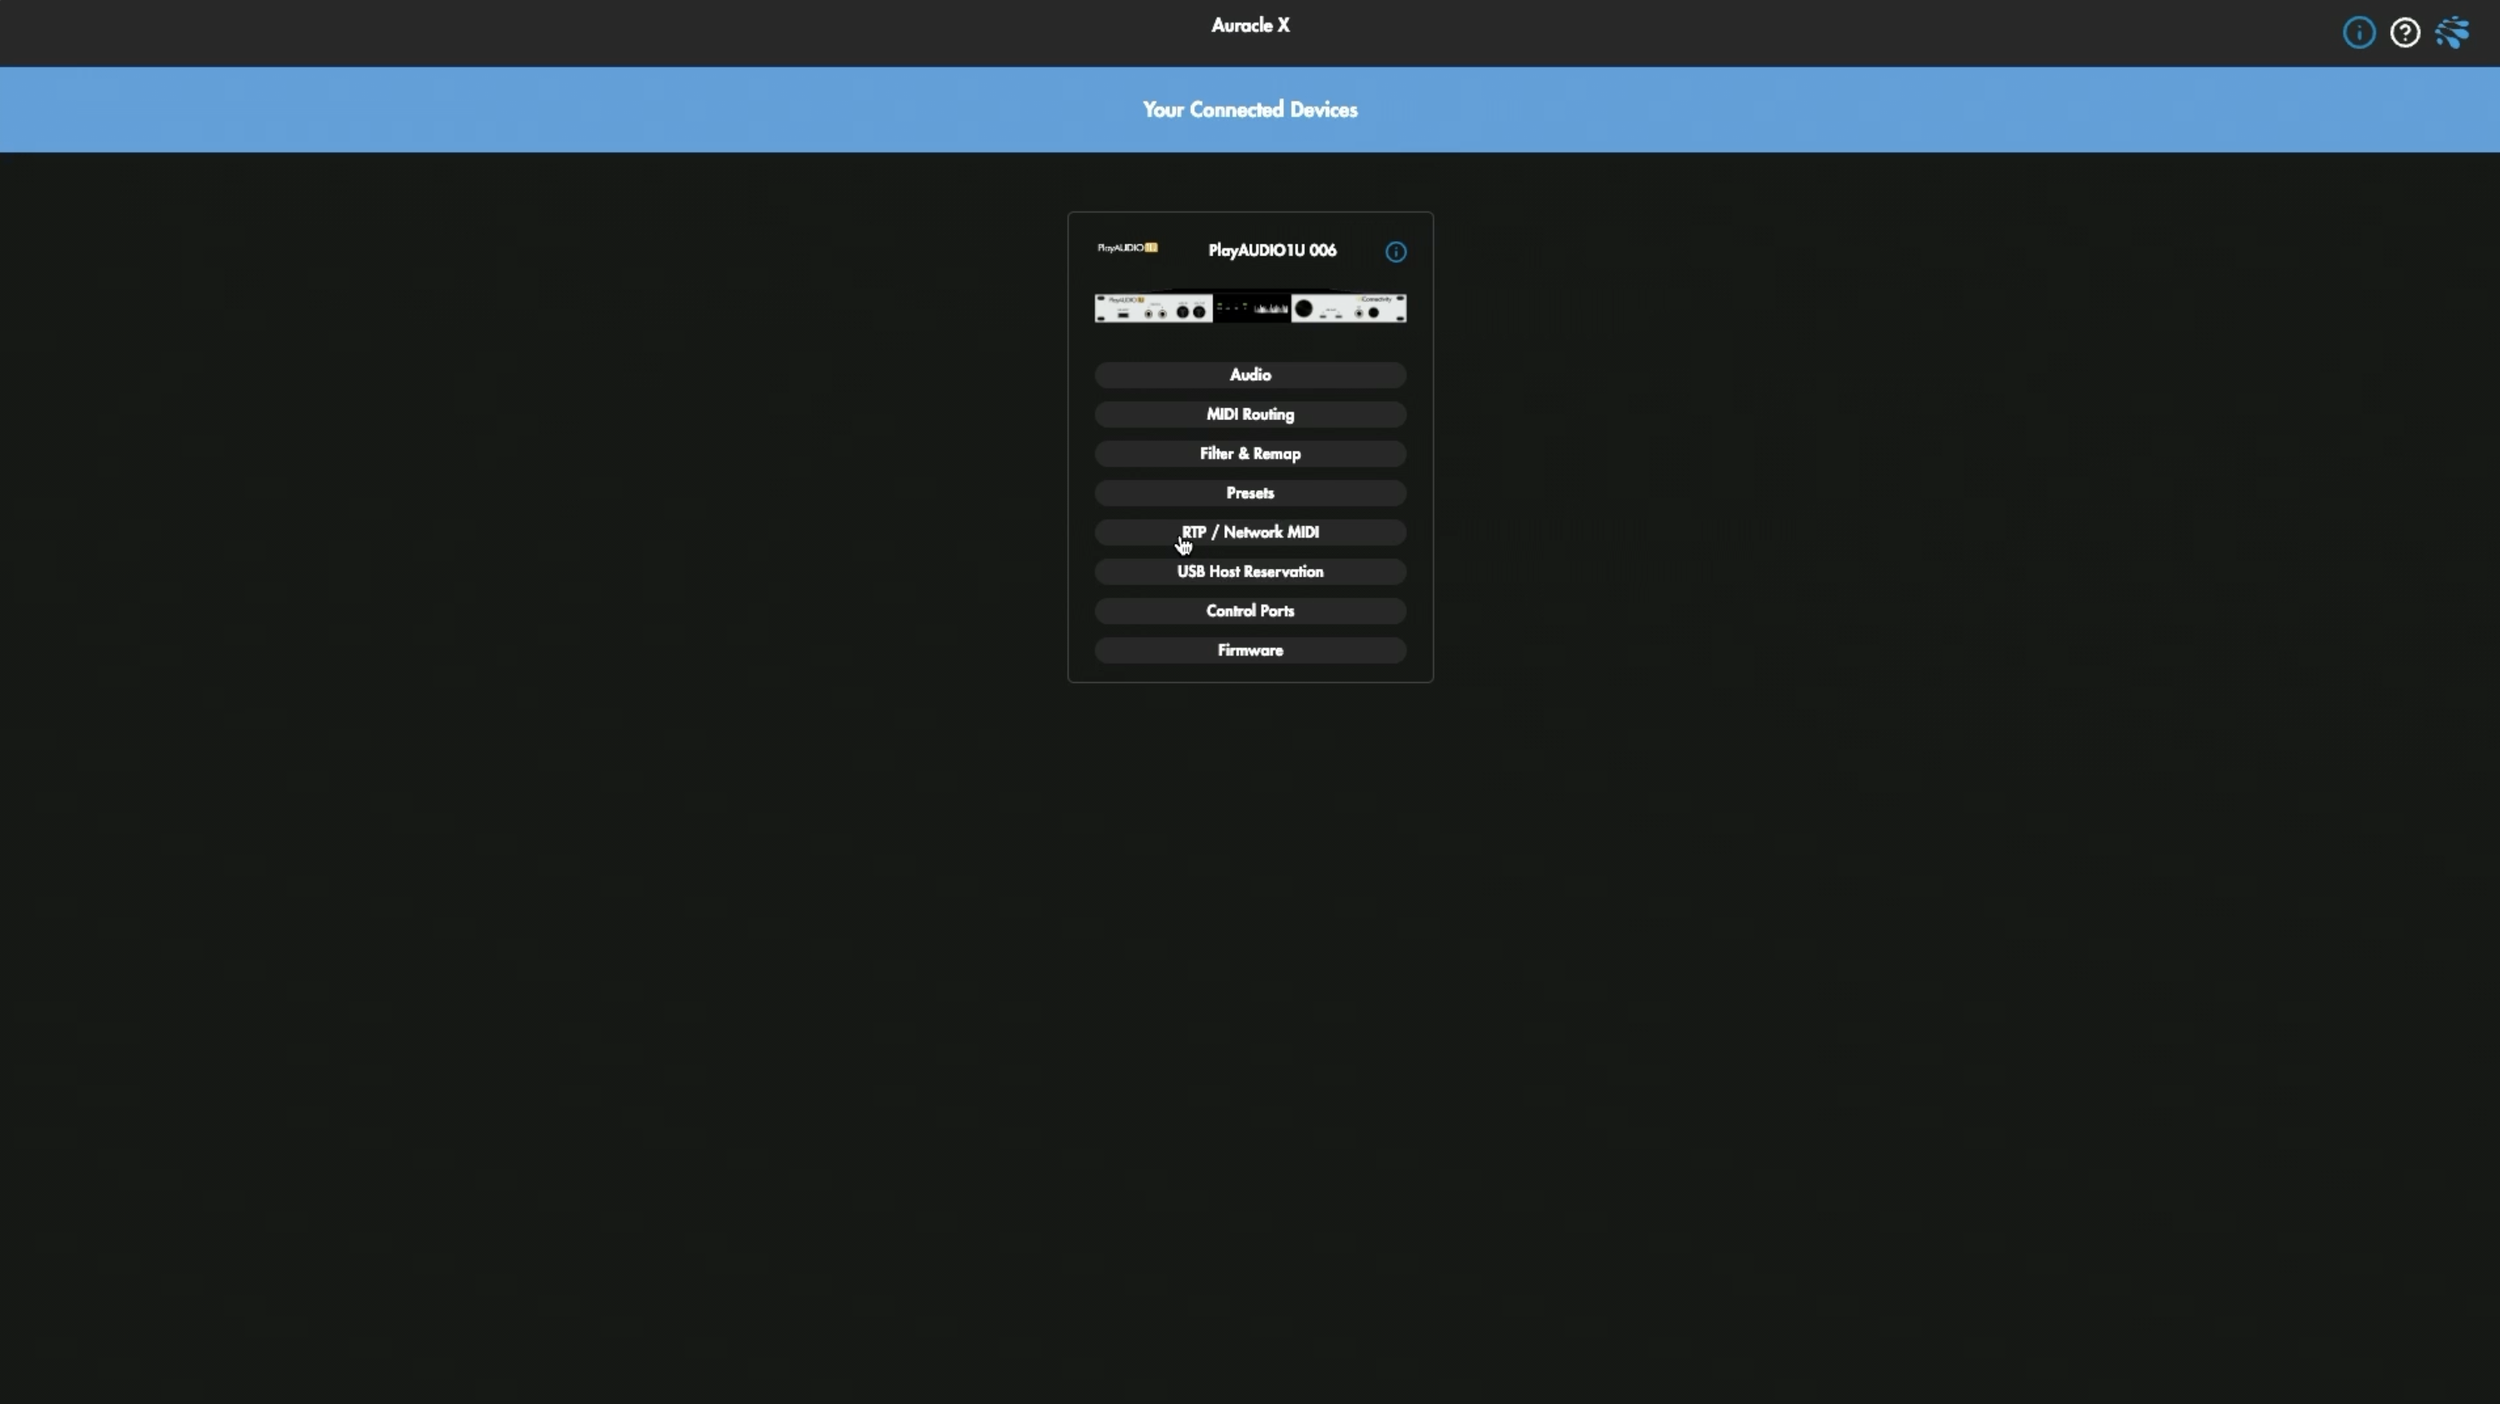
Launch Auracle for X-Series (Download Auracle for X-Series if you haven’t already) on your primary computer. This free software simplifies the control of your iConnectivity MIDI devices.
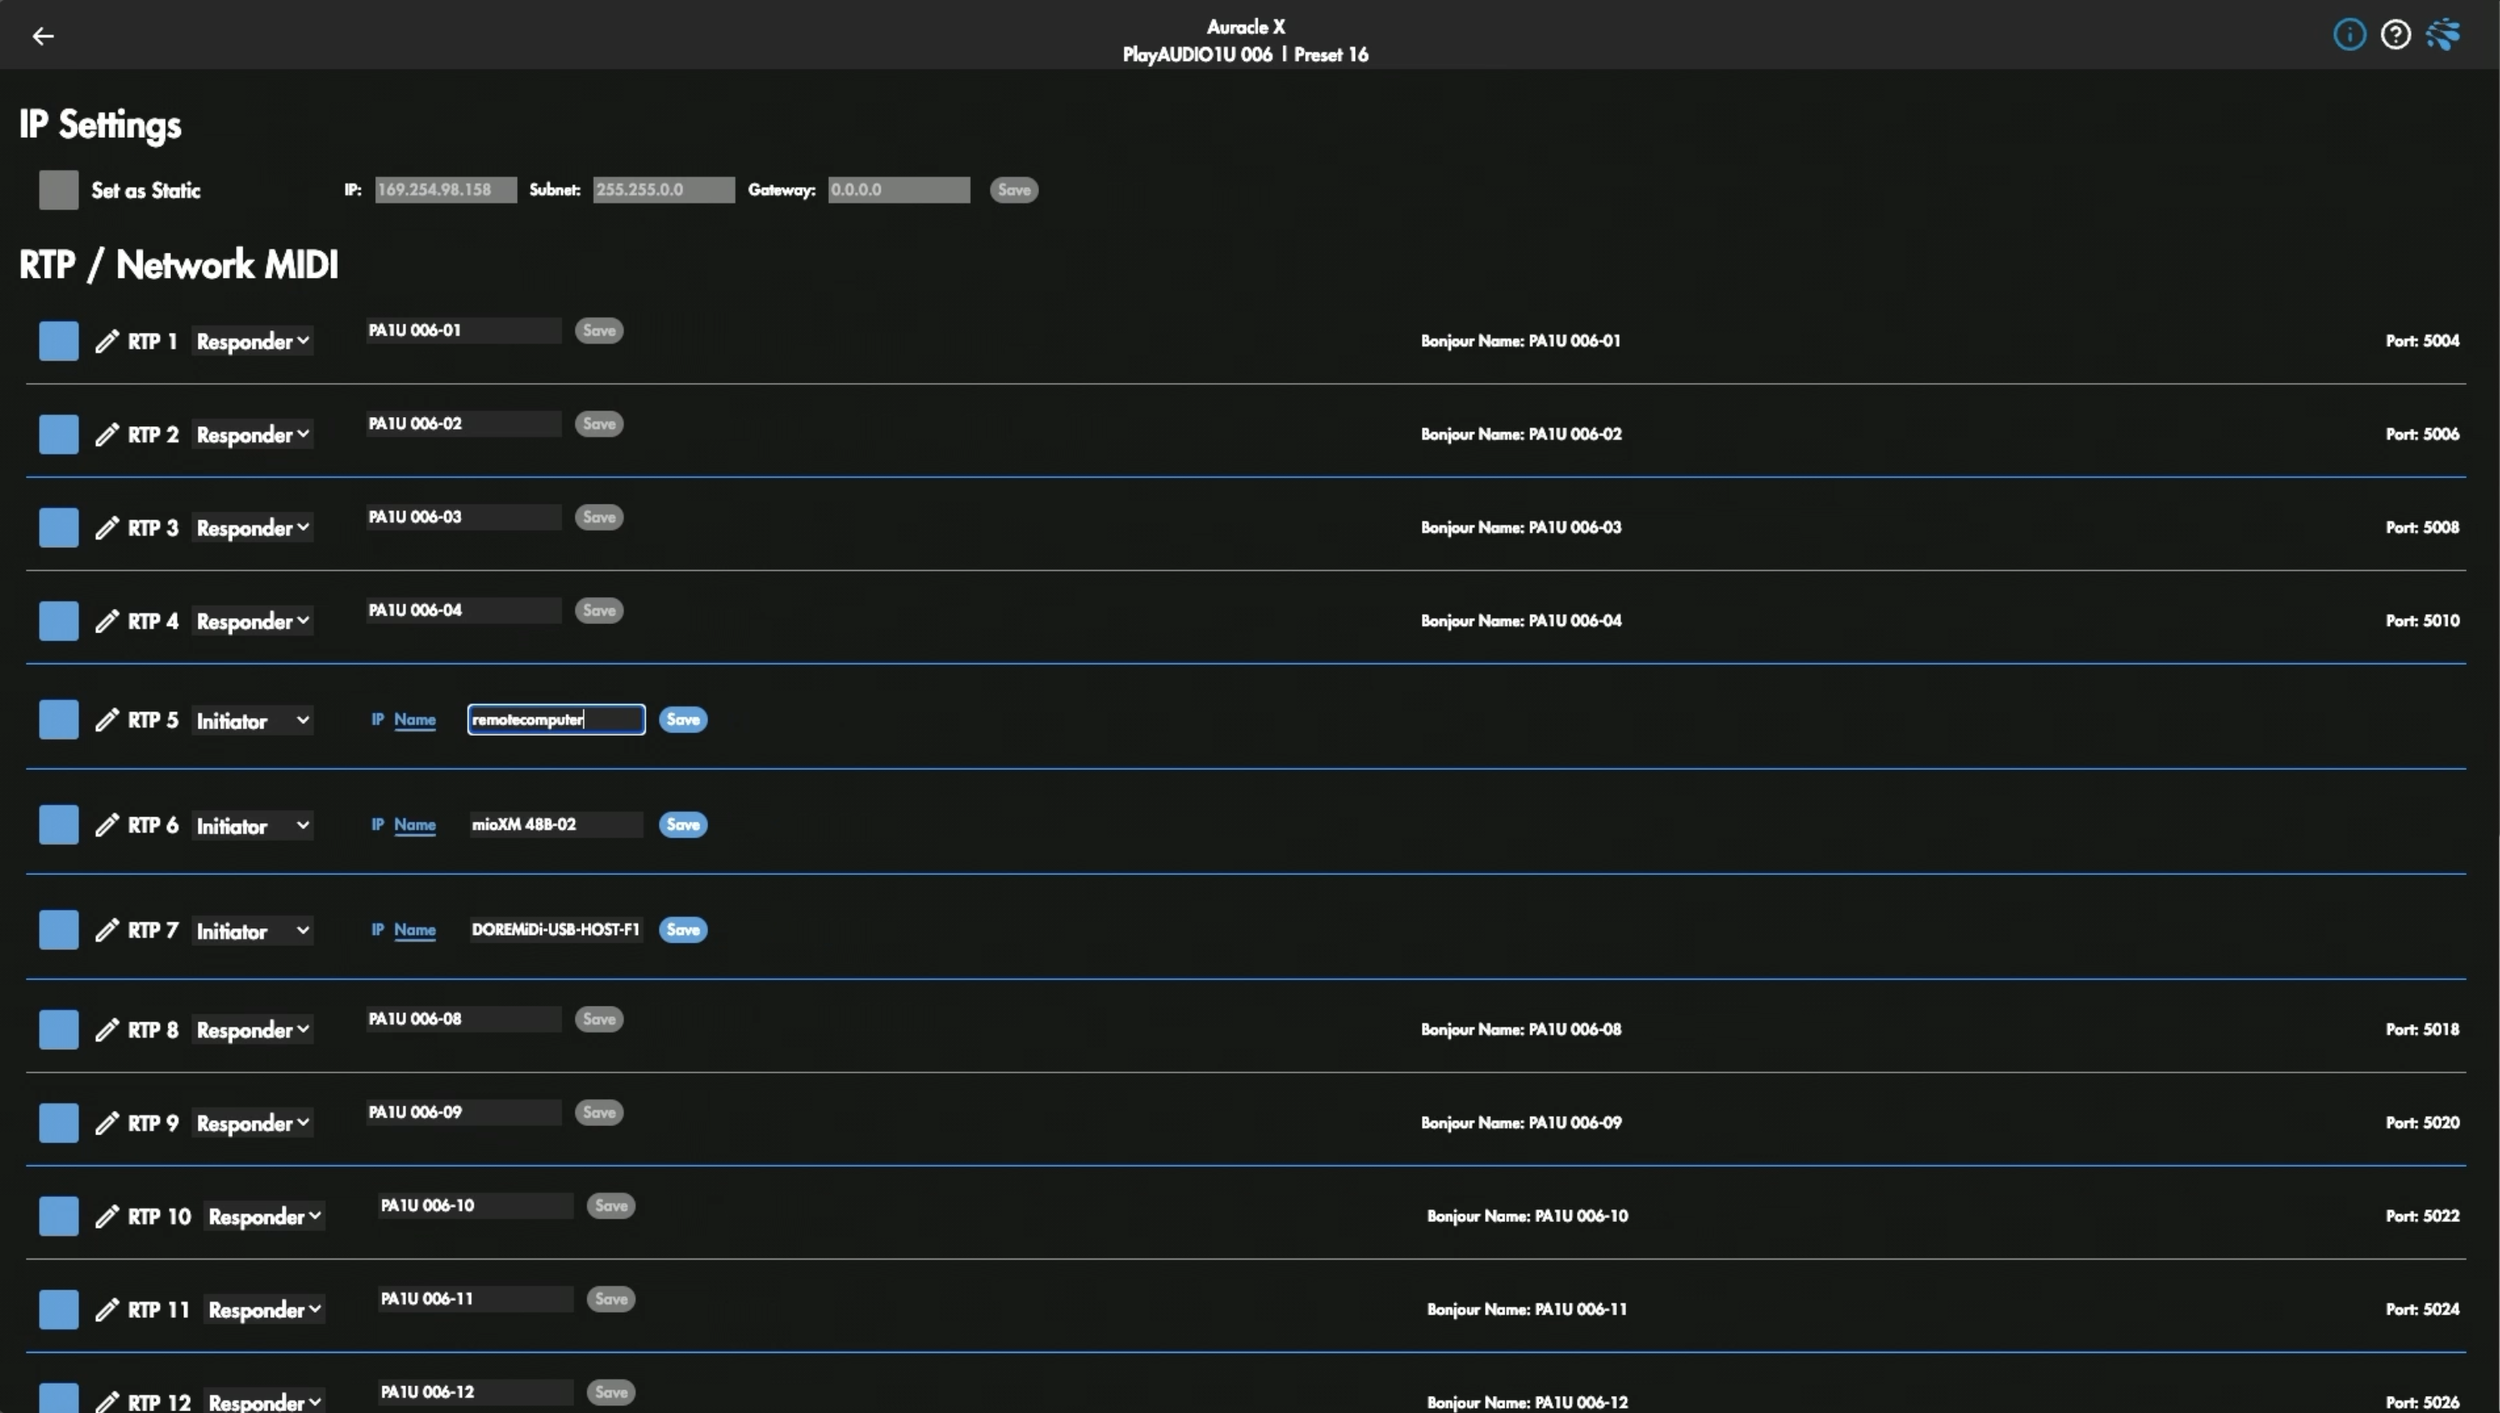
Navigate to the RTP / Network MIDI tab. Here, you’ll see up to 22 discrete MIDI ports, each representing a potential RTP connection.
Start with RTP5, as it’s the first RTP port that shows up in our DAW’s MIDI preferences. Make sure your type is set to initiator and type your Bonjour Name (e.g., "Remote Computer") and hit Save to establish a reliable connection between devices.
Verifying MIDI Routing For Playback Redundancy
With RTP5 configured, MIDI data can flow to the remote computer without overlap, as Auracle’s routing ensures only one computer (primary or backup) communicates with the remote device at any time.
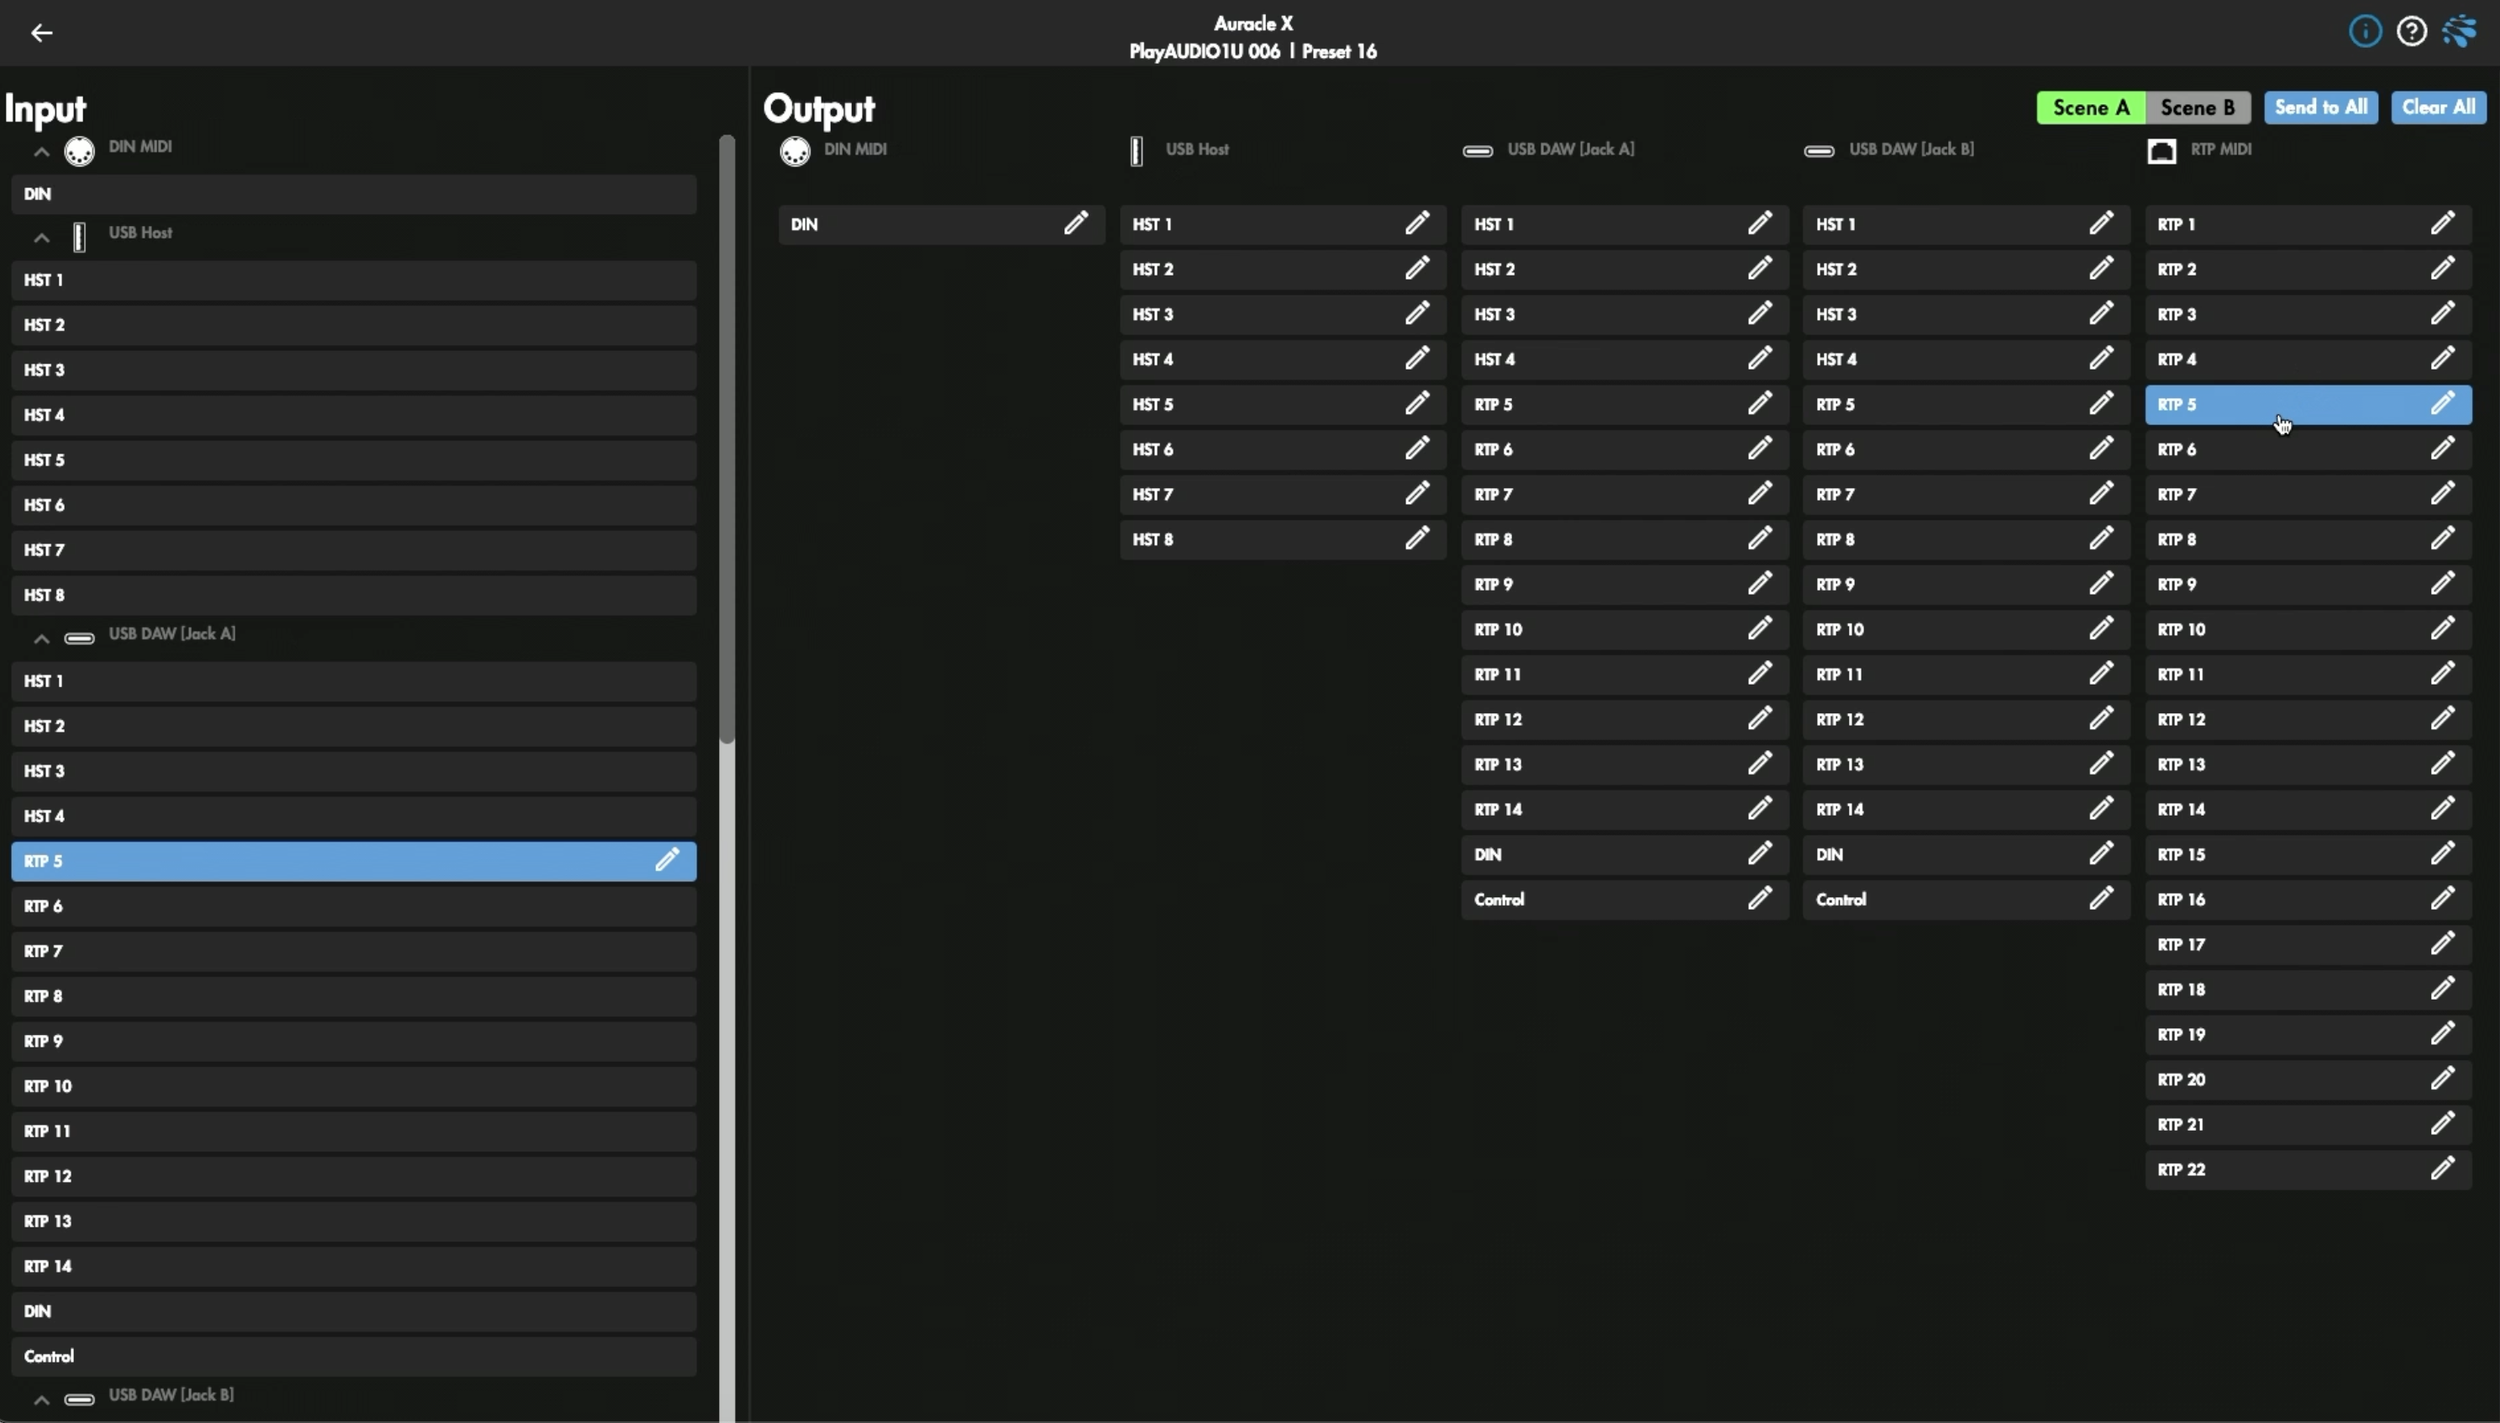
In Auracle you can verify these settings by looking under the MIDI Routing tab. For USB DAW (Jack A) under RTP MIDI, you will see that RTP5 is enabled on Scene A but not Scene B. Under USB DAW (Jack B) it’s reversed by default so that in the case of primary computer failure, Scene B takes over.
DAW Integration and MIDI Routing
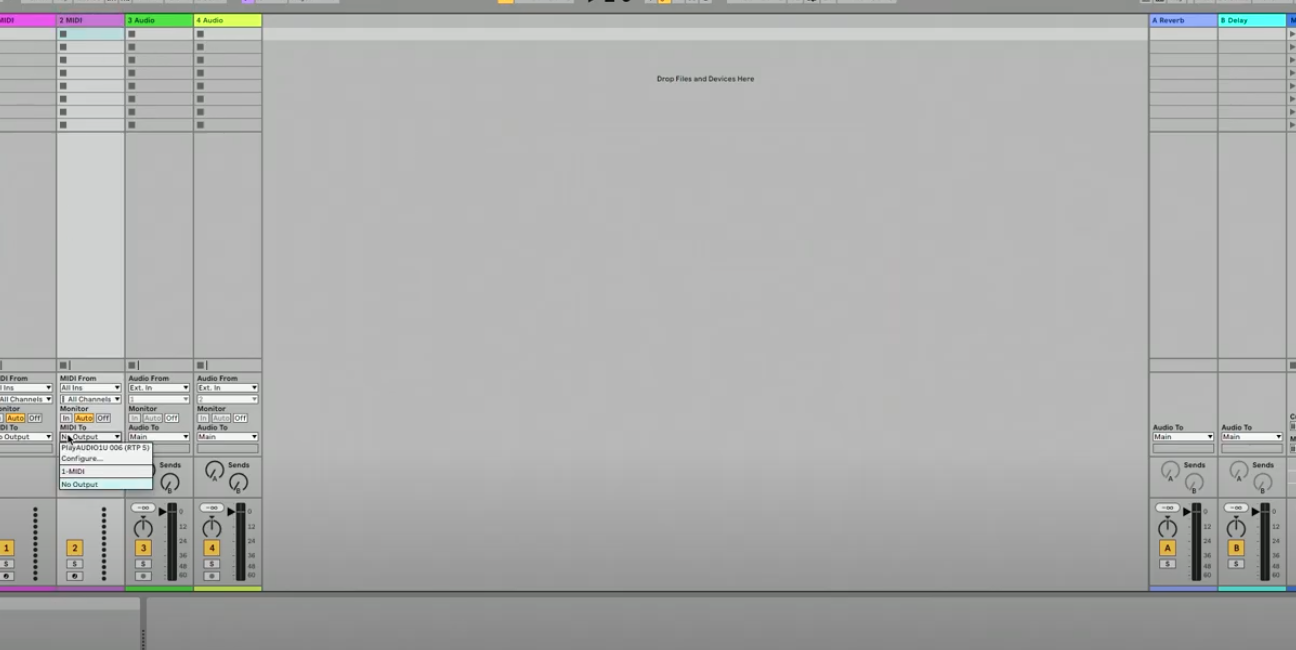
In your DAW, in this case Ableton Live, navigate to MIDI Preferences, and enable Track on the RTP5 output port.
Under your MIDI track select PlayAUDIO1U 006 (RTP 5) in the MIDI To section. Within your DAW’s MIDI tracks, you can also select specific channels (1–16) for MIDI data transmission, allowing targeted control over MIDI channels.
For your backup computer you’ll repeat the same steps to ensure a seamless experience without MIDI doubling.
Connecting with Software on the Remote Device
Open ProPresenter (or any software capable of receiving MIDI) on the remote computer. While the exact steps may vary depending on your software, the principle will remain the same.
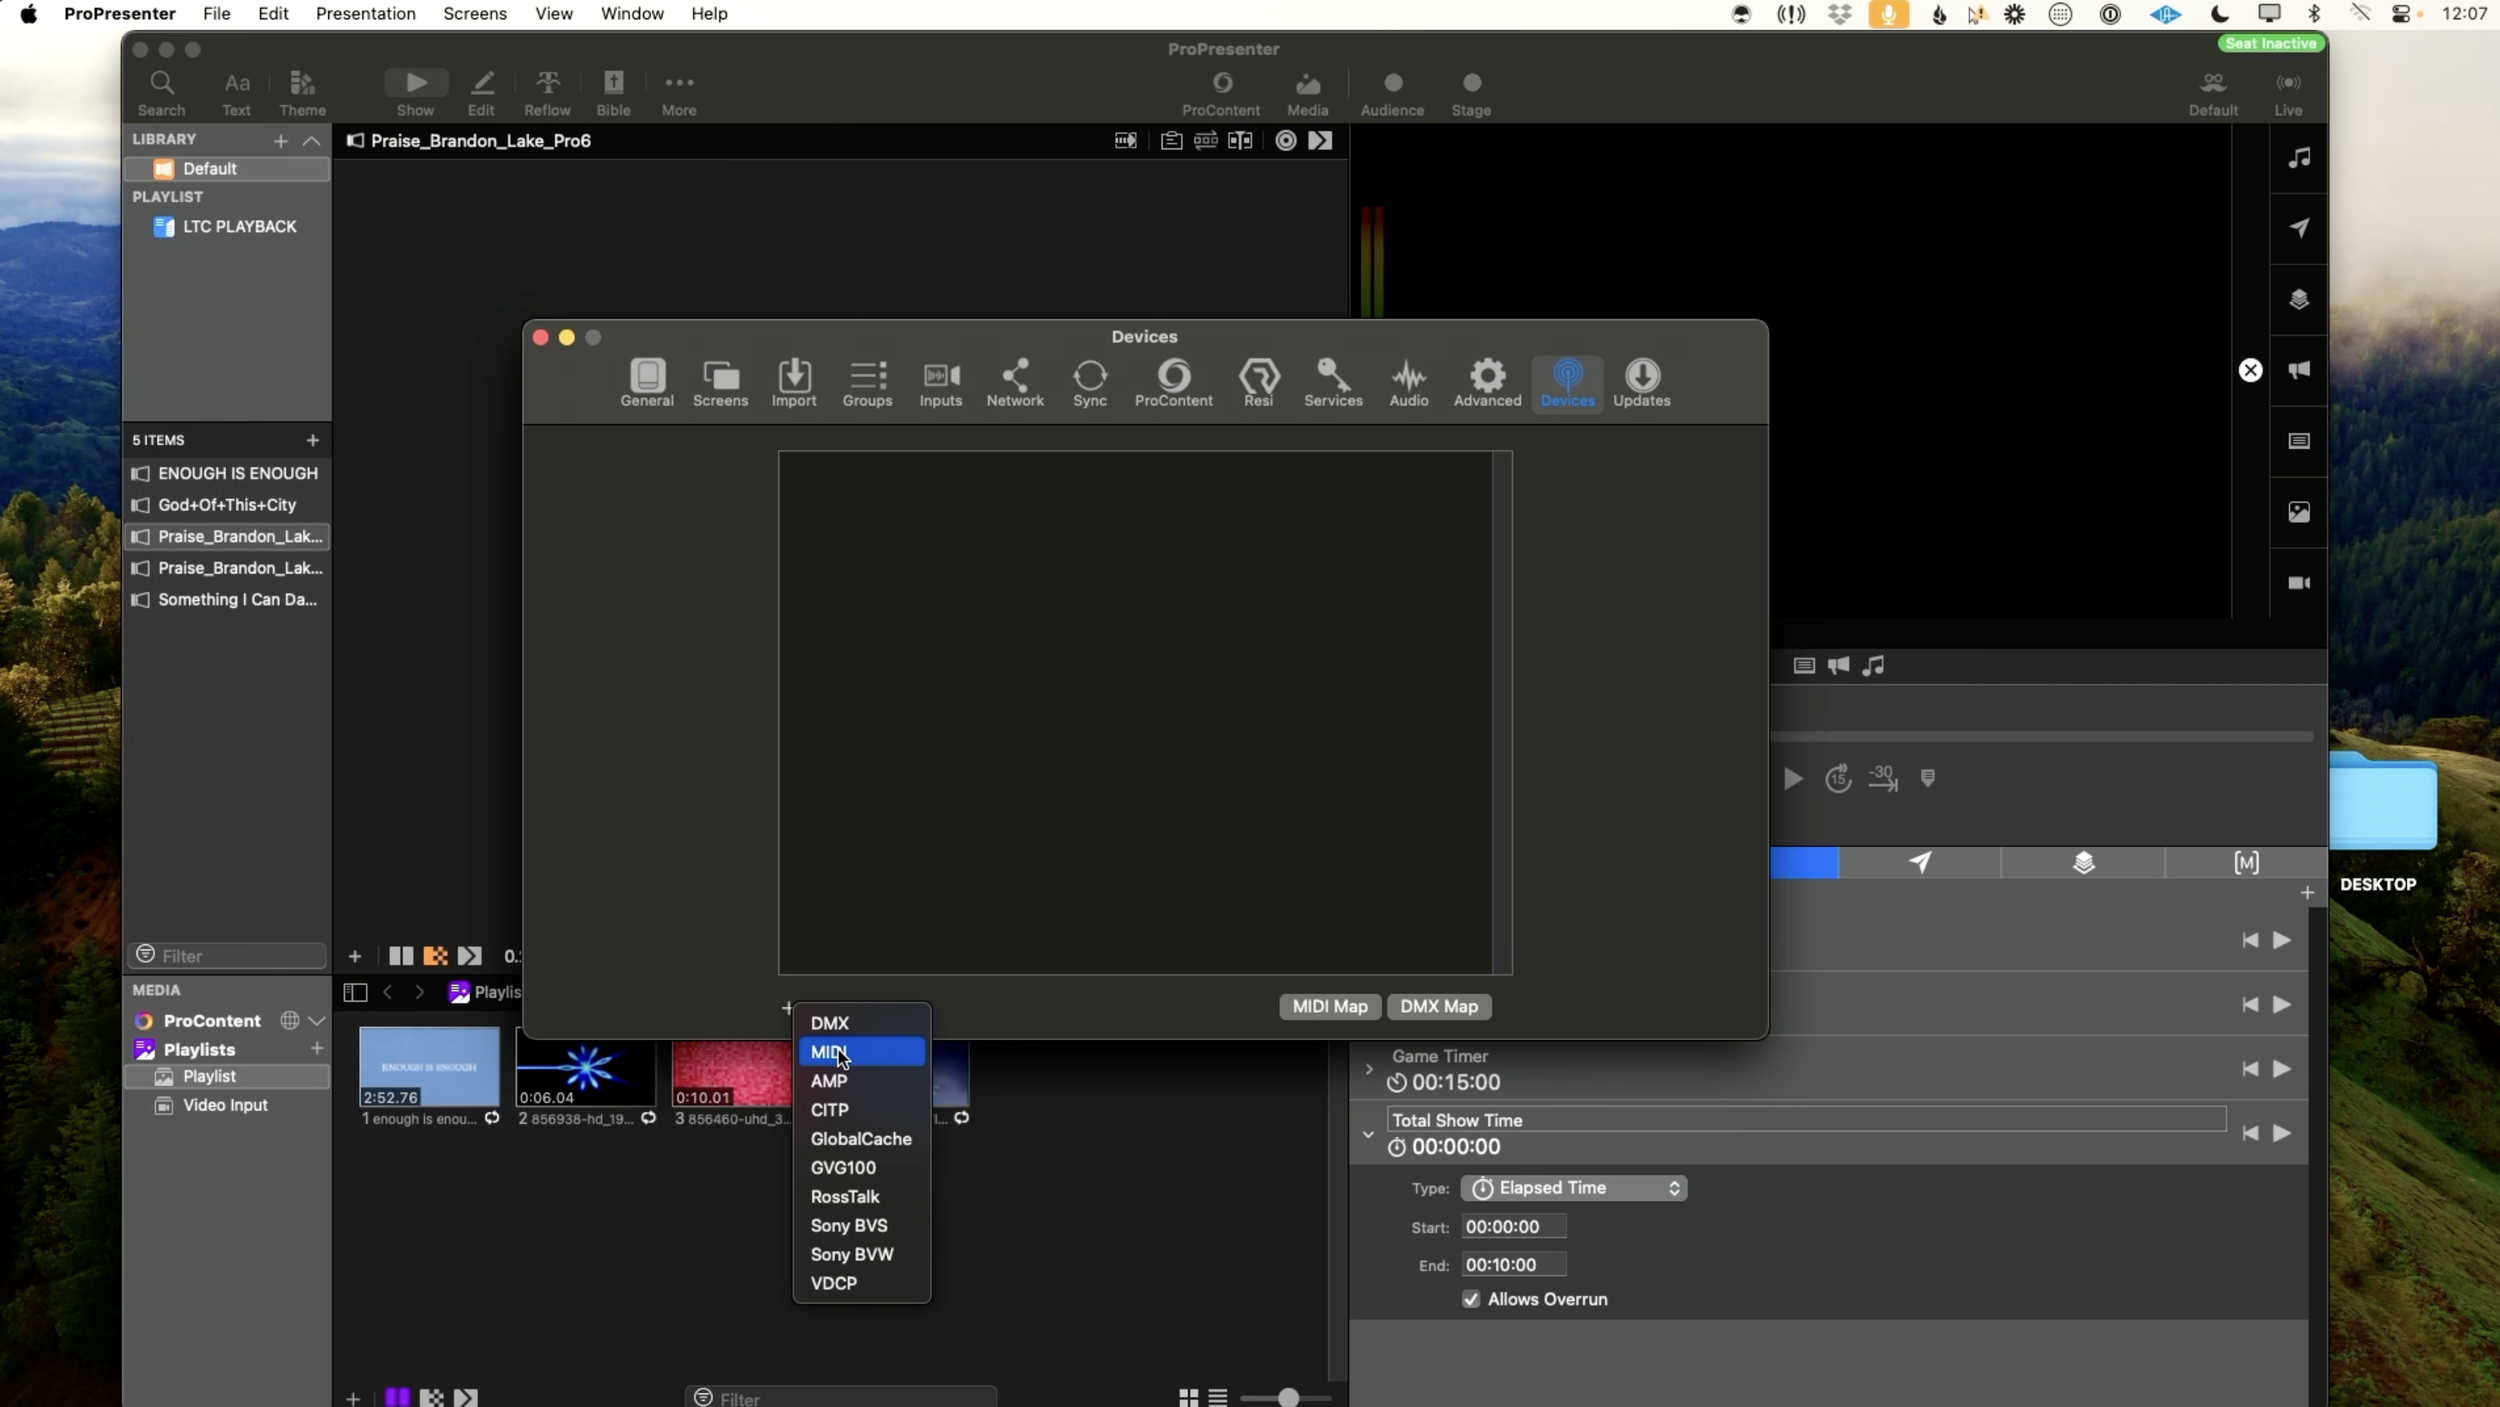
In ProPresenter, navigate to Devices under the settings menu and press the “+” icon near the bottom left of the window. Select MIDI and then choose the following:
Hardware - CoreMIDI Device
Sources - Remote MIDI (Set up previously on our remote computer)
Once these are selected go back and then hit Connect to establish a consistent input source. Congratulations, you’ve now got a fully redundant MIDI setup!
Eliminate Potential Points of Failure
By using PlayAUDIO1U and RTP MIDI, you've set up a reliable, fully redundant MIDI system across multiple computers. If one computer fails, the other will instantly take over, ensuring uninterrupted MIDI output and improving reliability for both live performances and studio work.
Check out our blog page to dive deeper into more articles on optimizing your setup!
Have any questions we didn't cover in this article? Visit our help center for more support.
